
Cape Wickham Australia, follow along as I attempt to break 80. Hole layouts are below.
Hole by hole
Click a hole title to watch it in the video above.
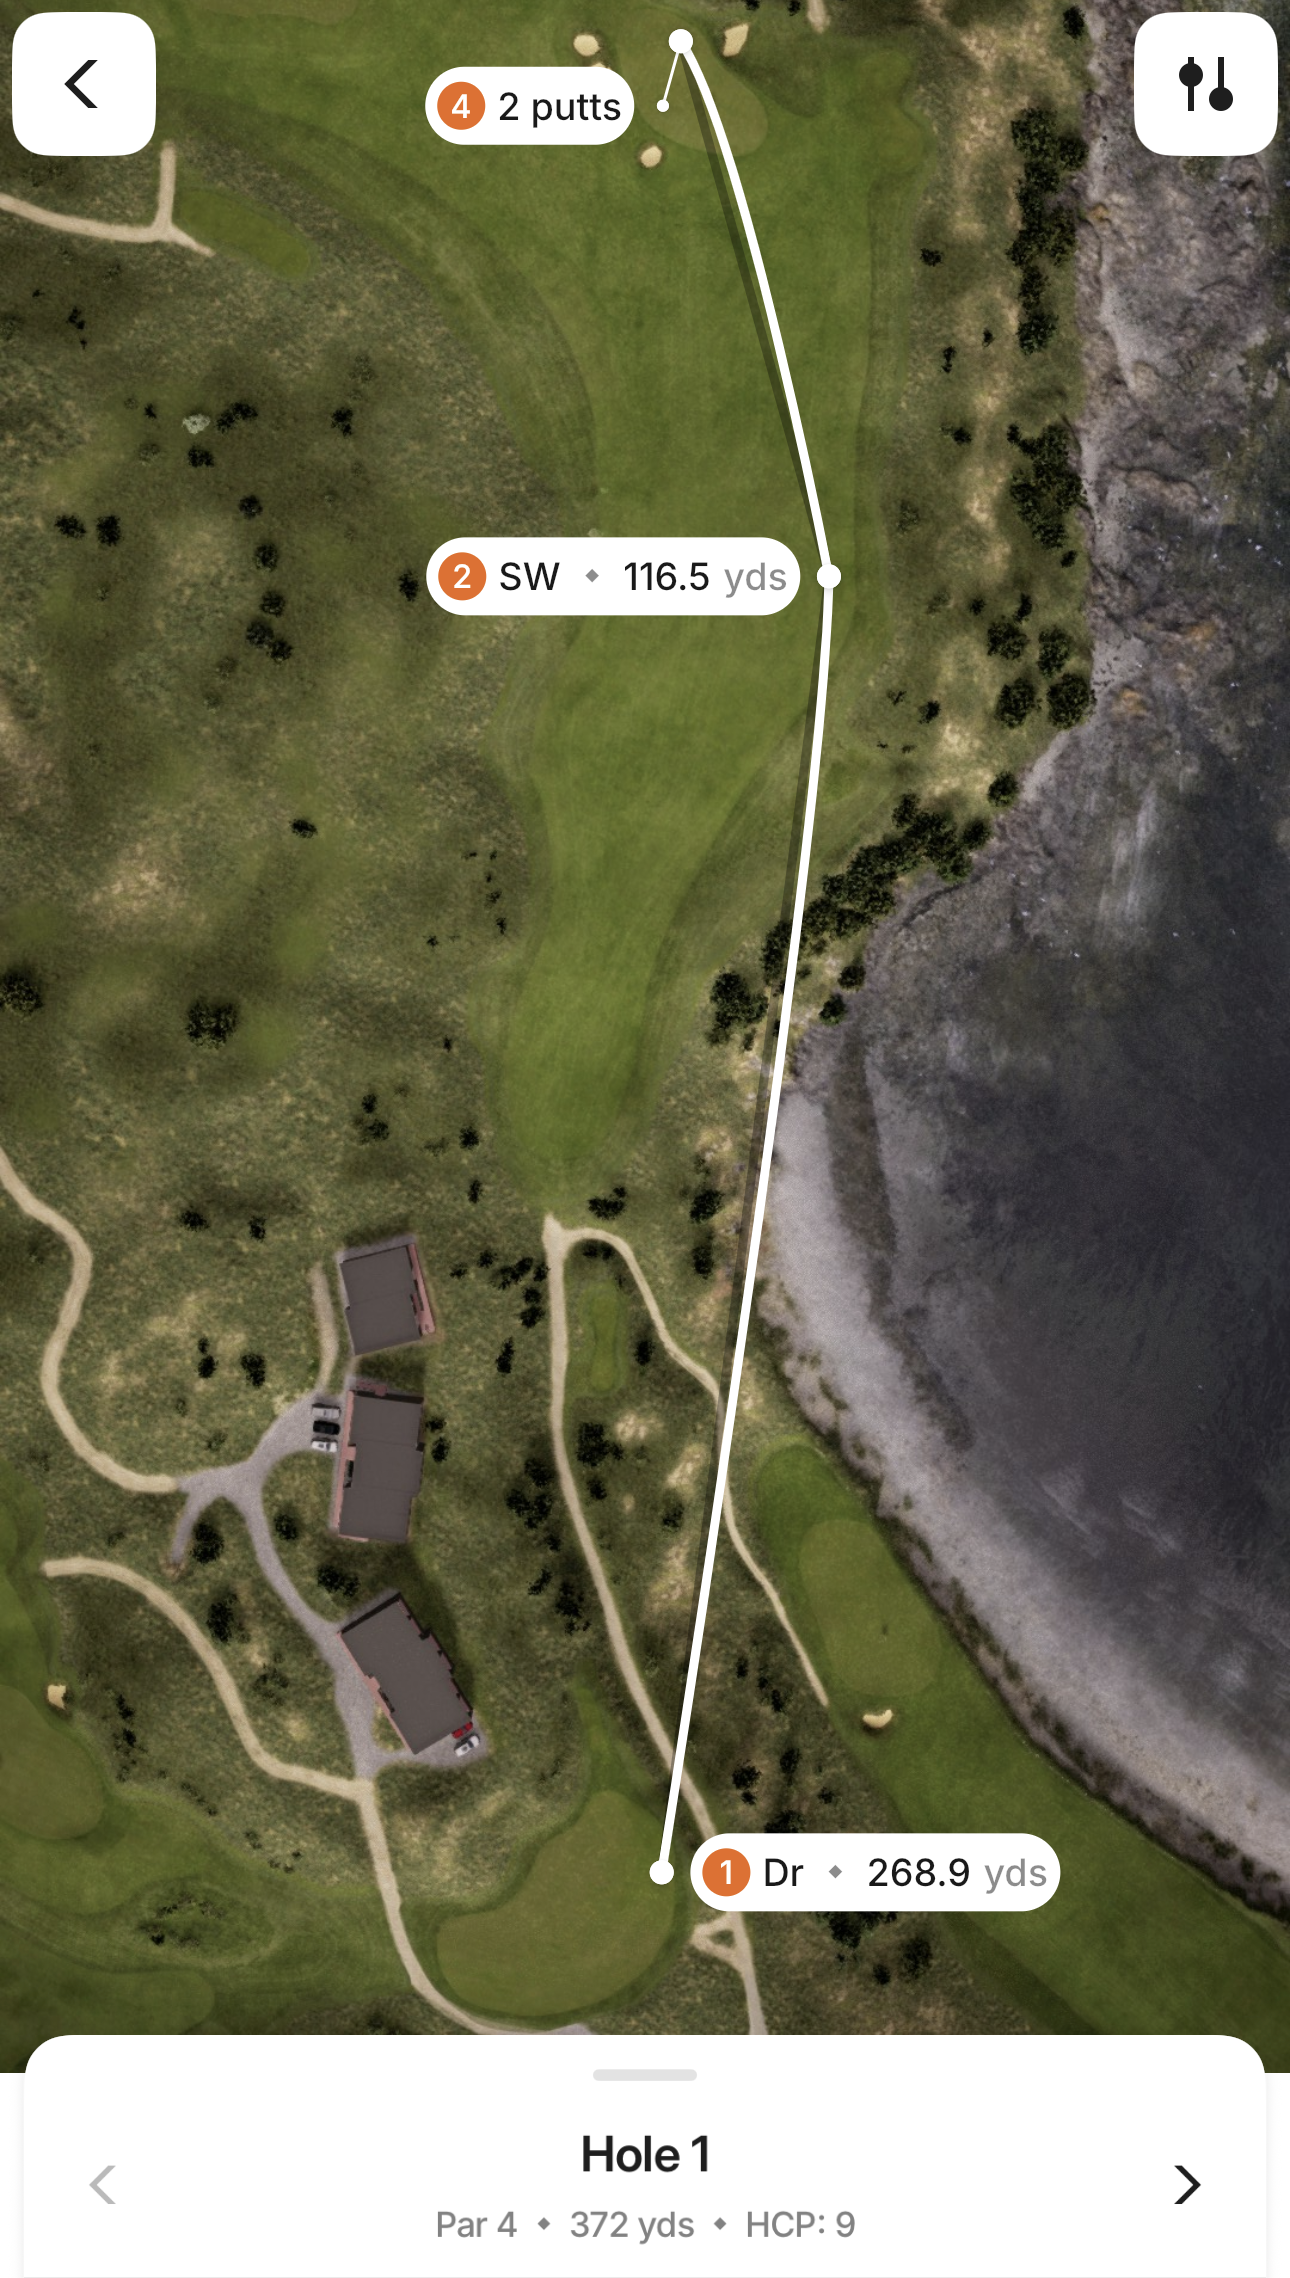
Hole 1
Find the wide fairway, then allow your approach to release onto the two-tier green.
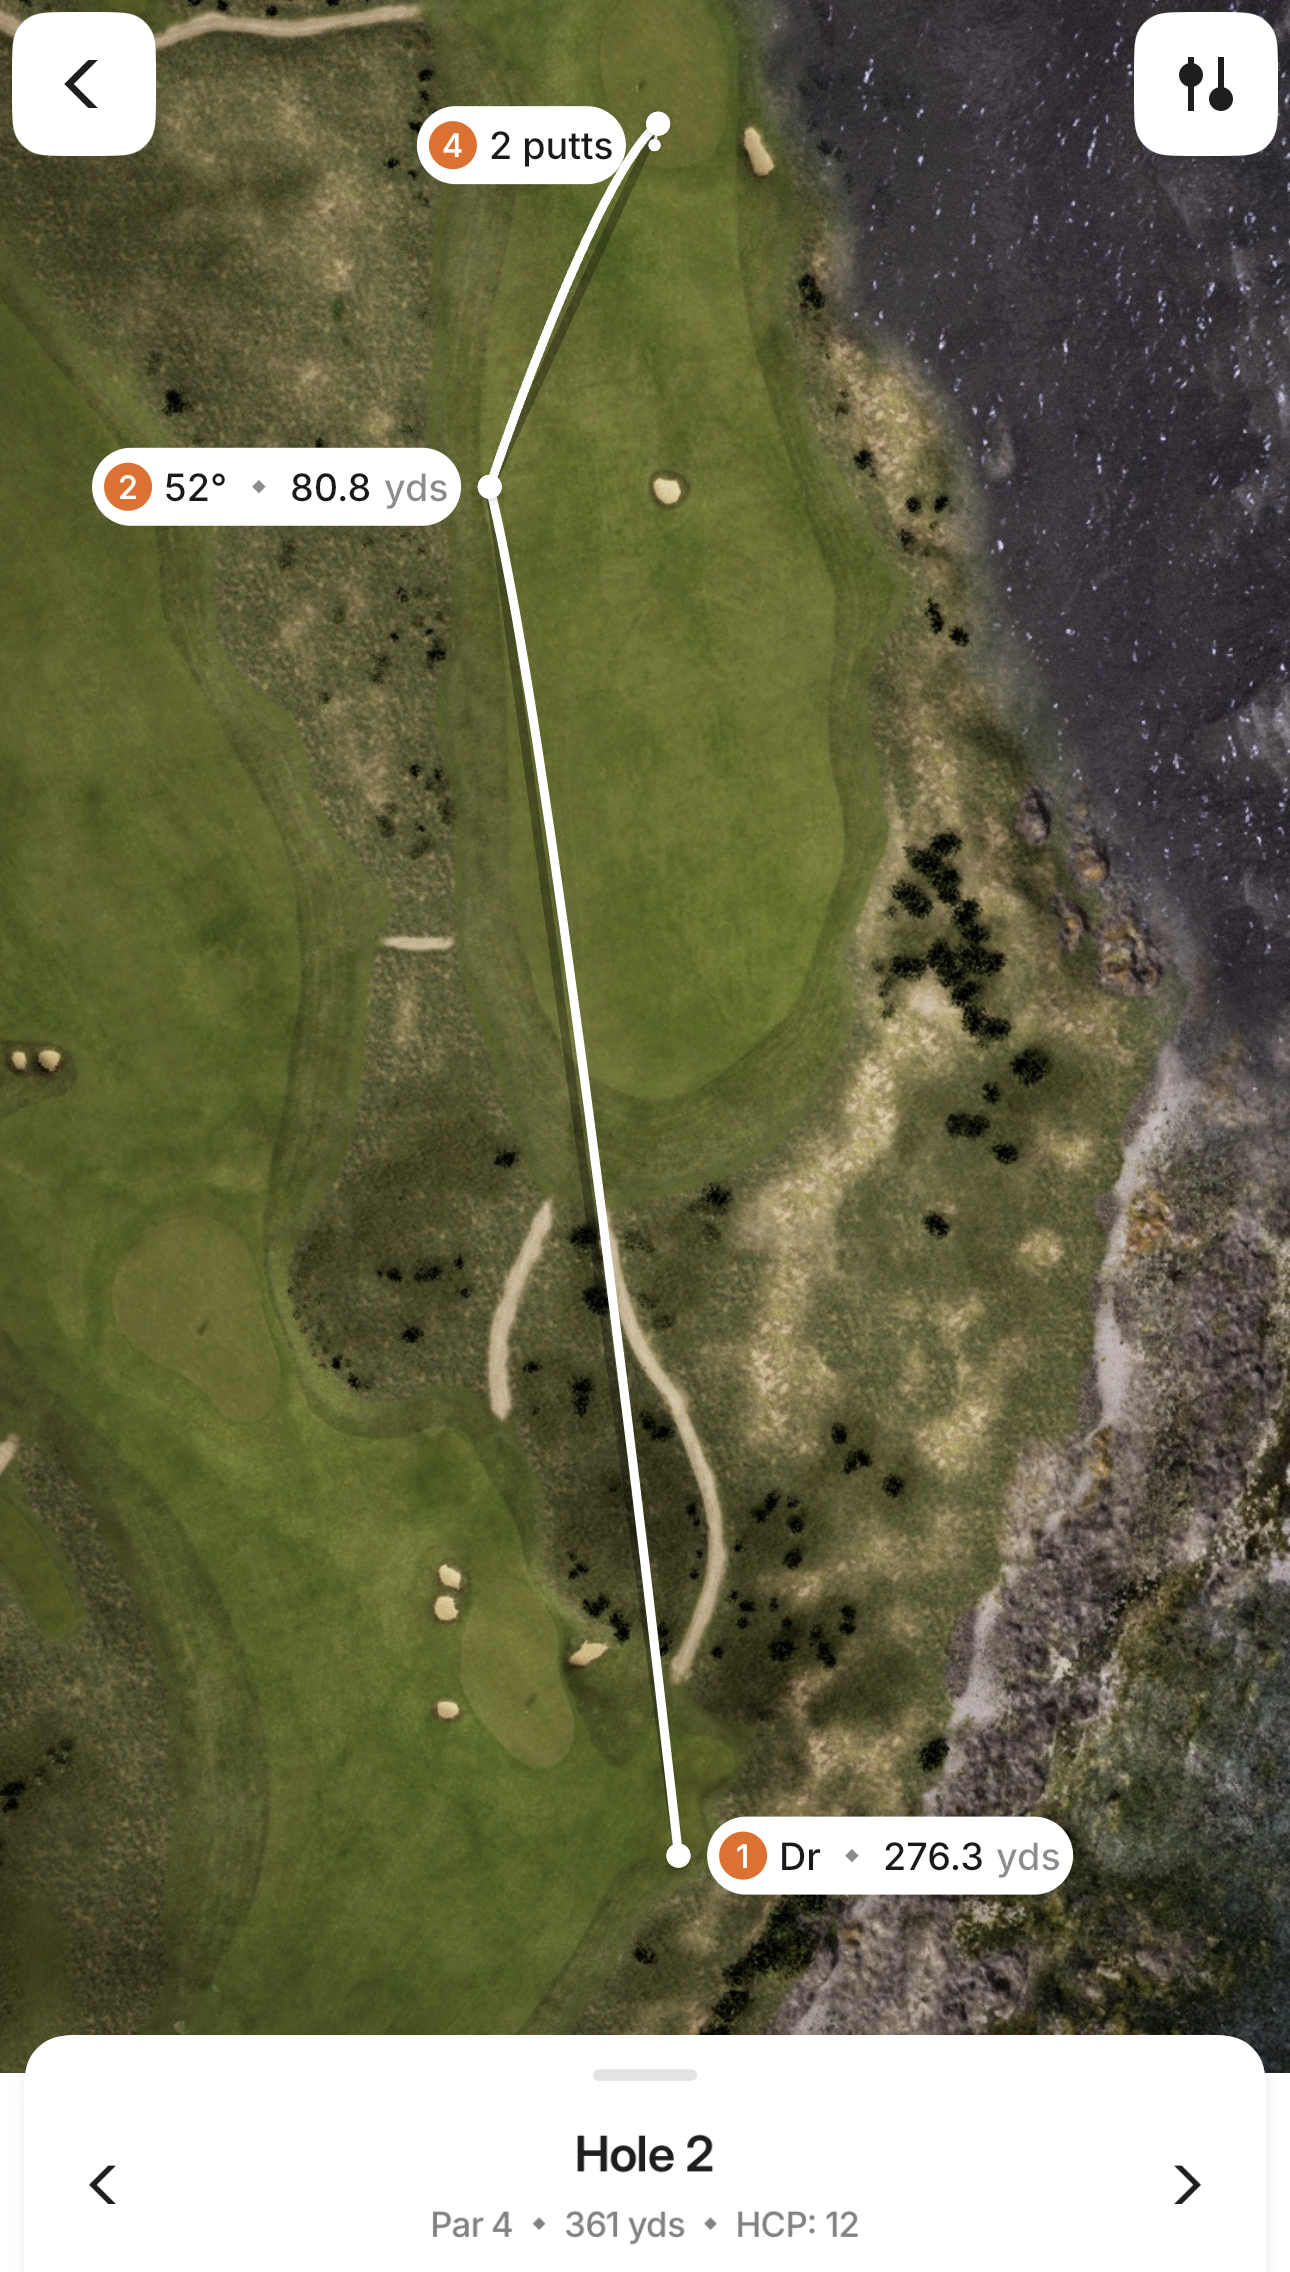
Hole 2
Play left of the central fairway bunker, then favor the right side of the green.
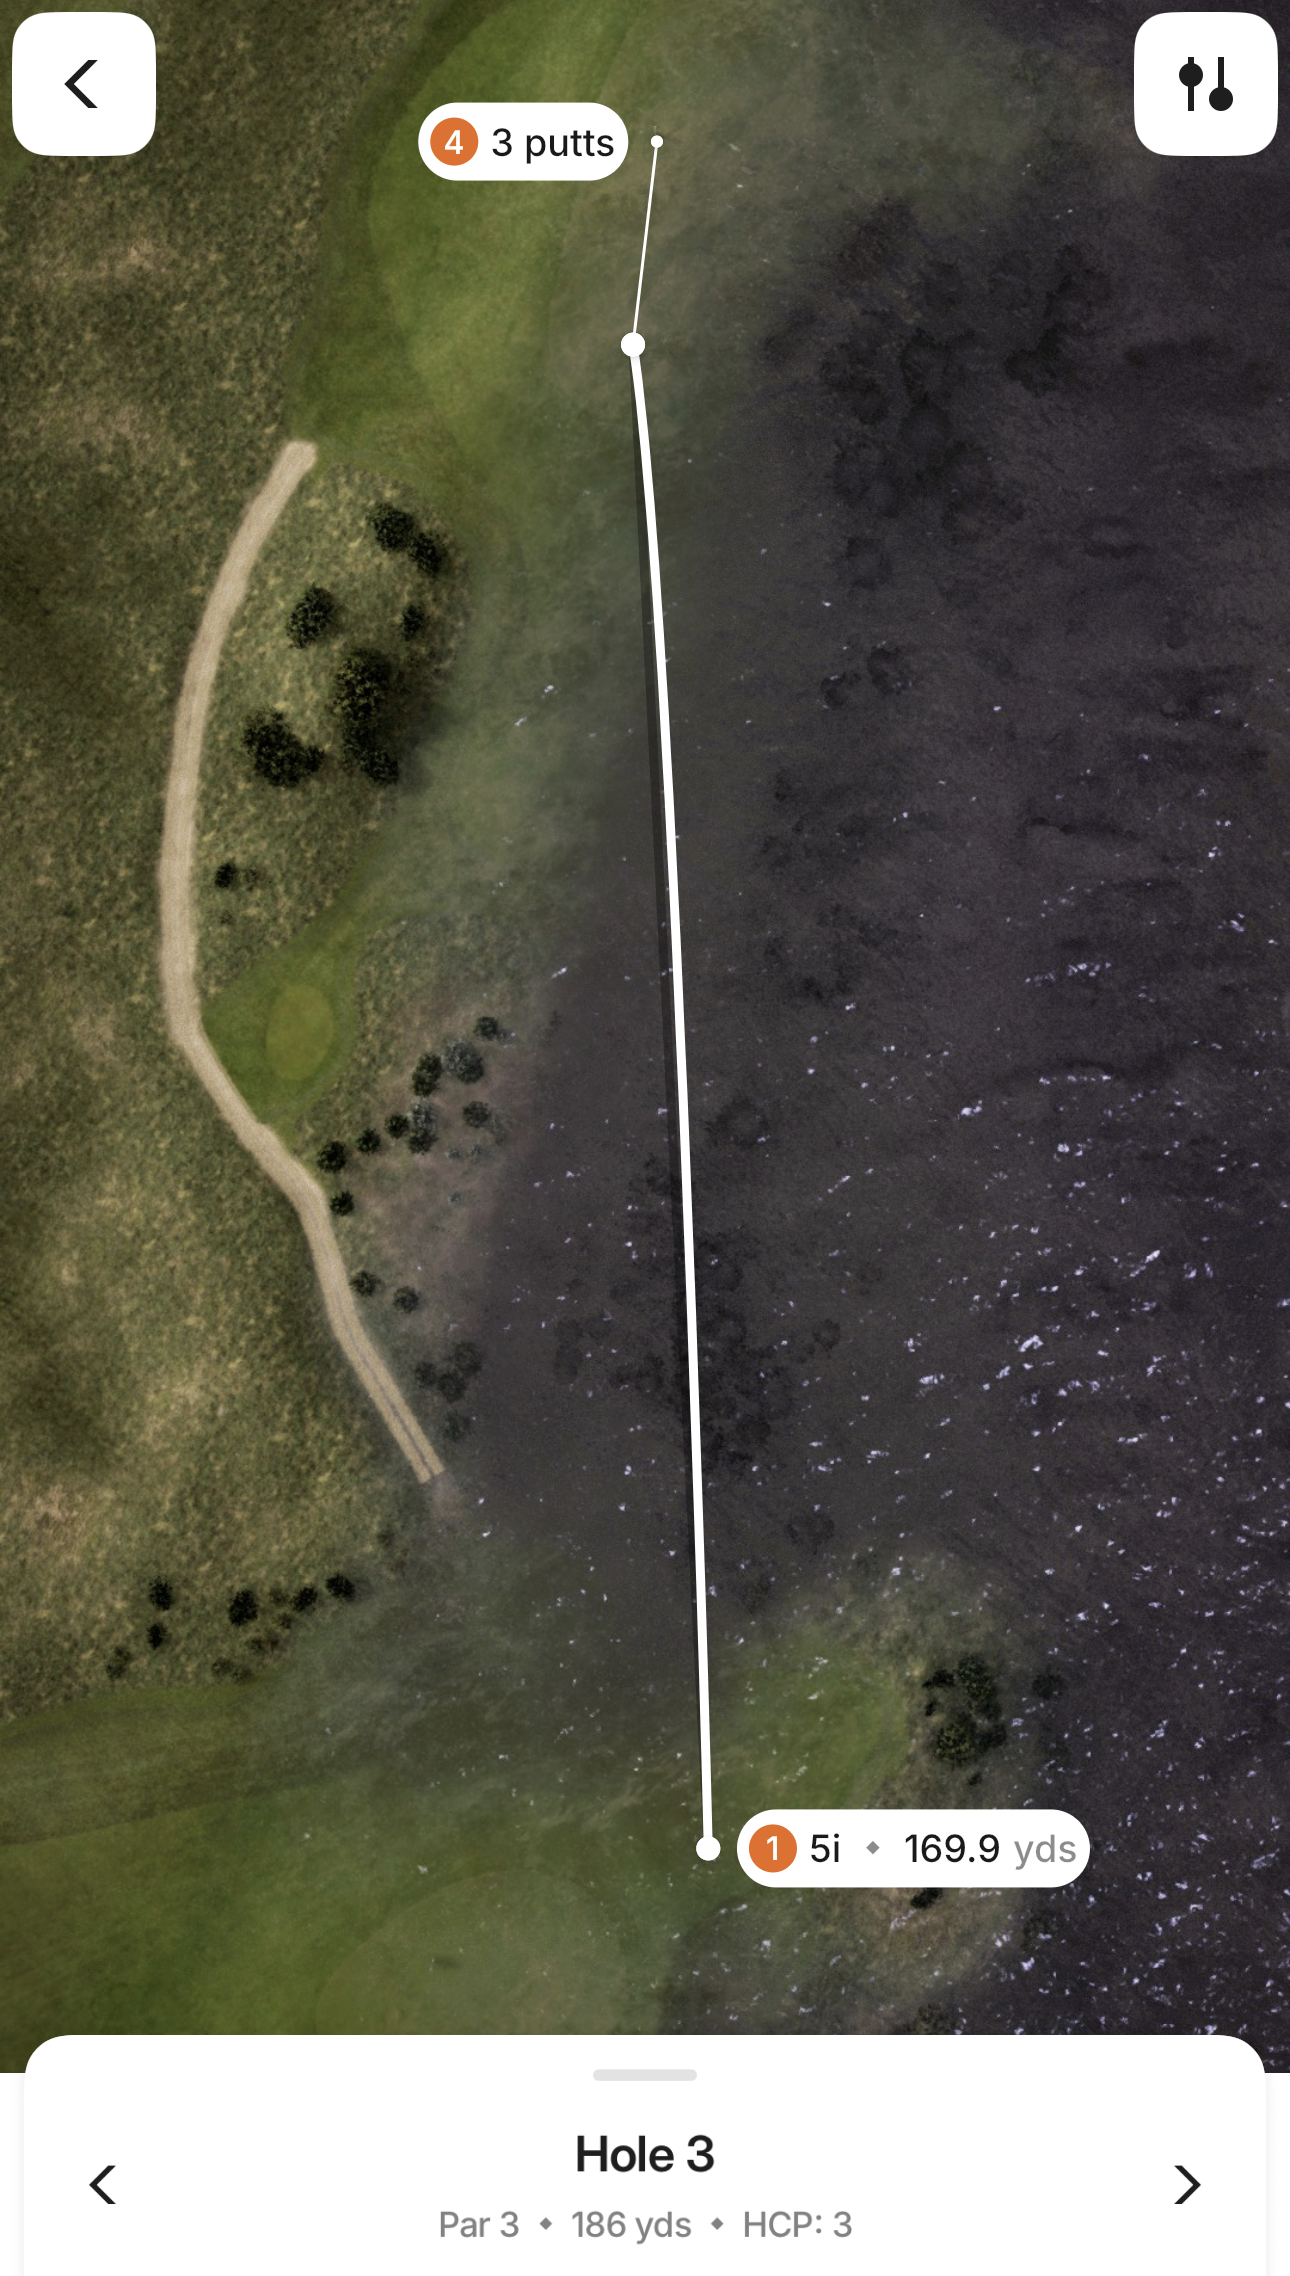
Hole 3
Allow for the wind and favor the left green; the slope feeds balls toward the right.
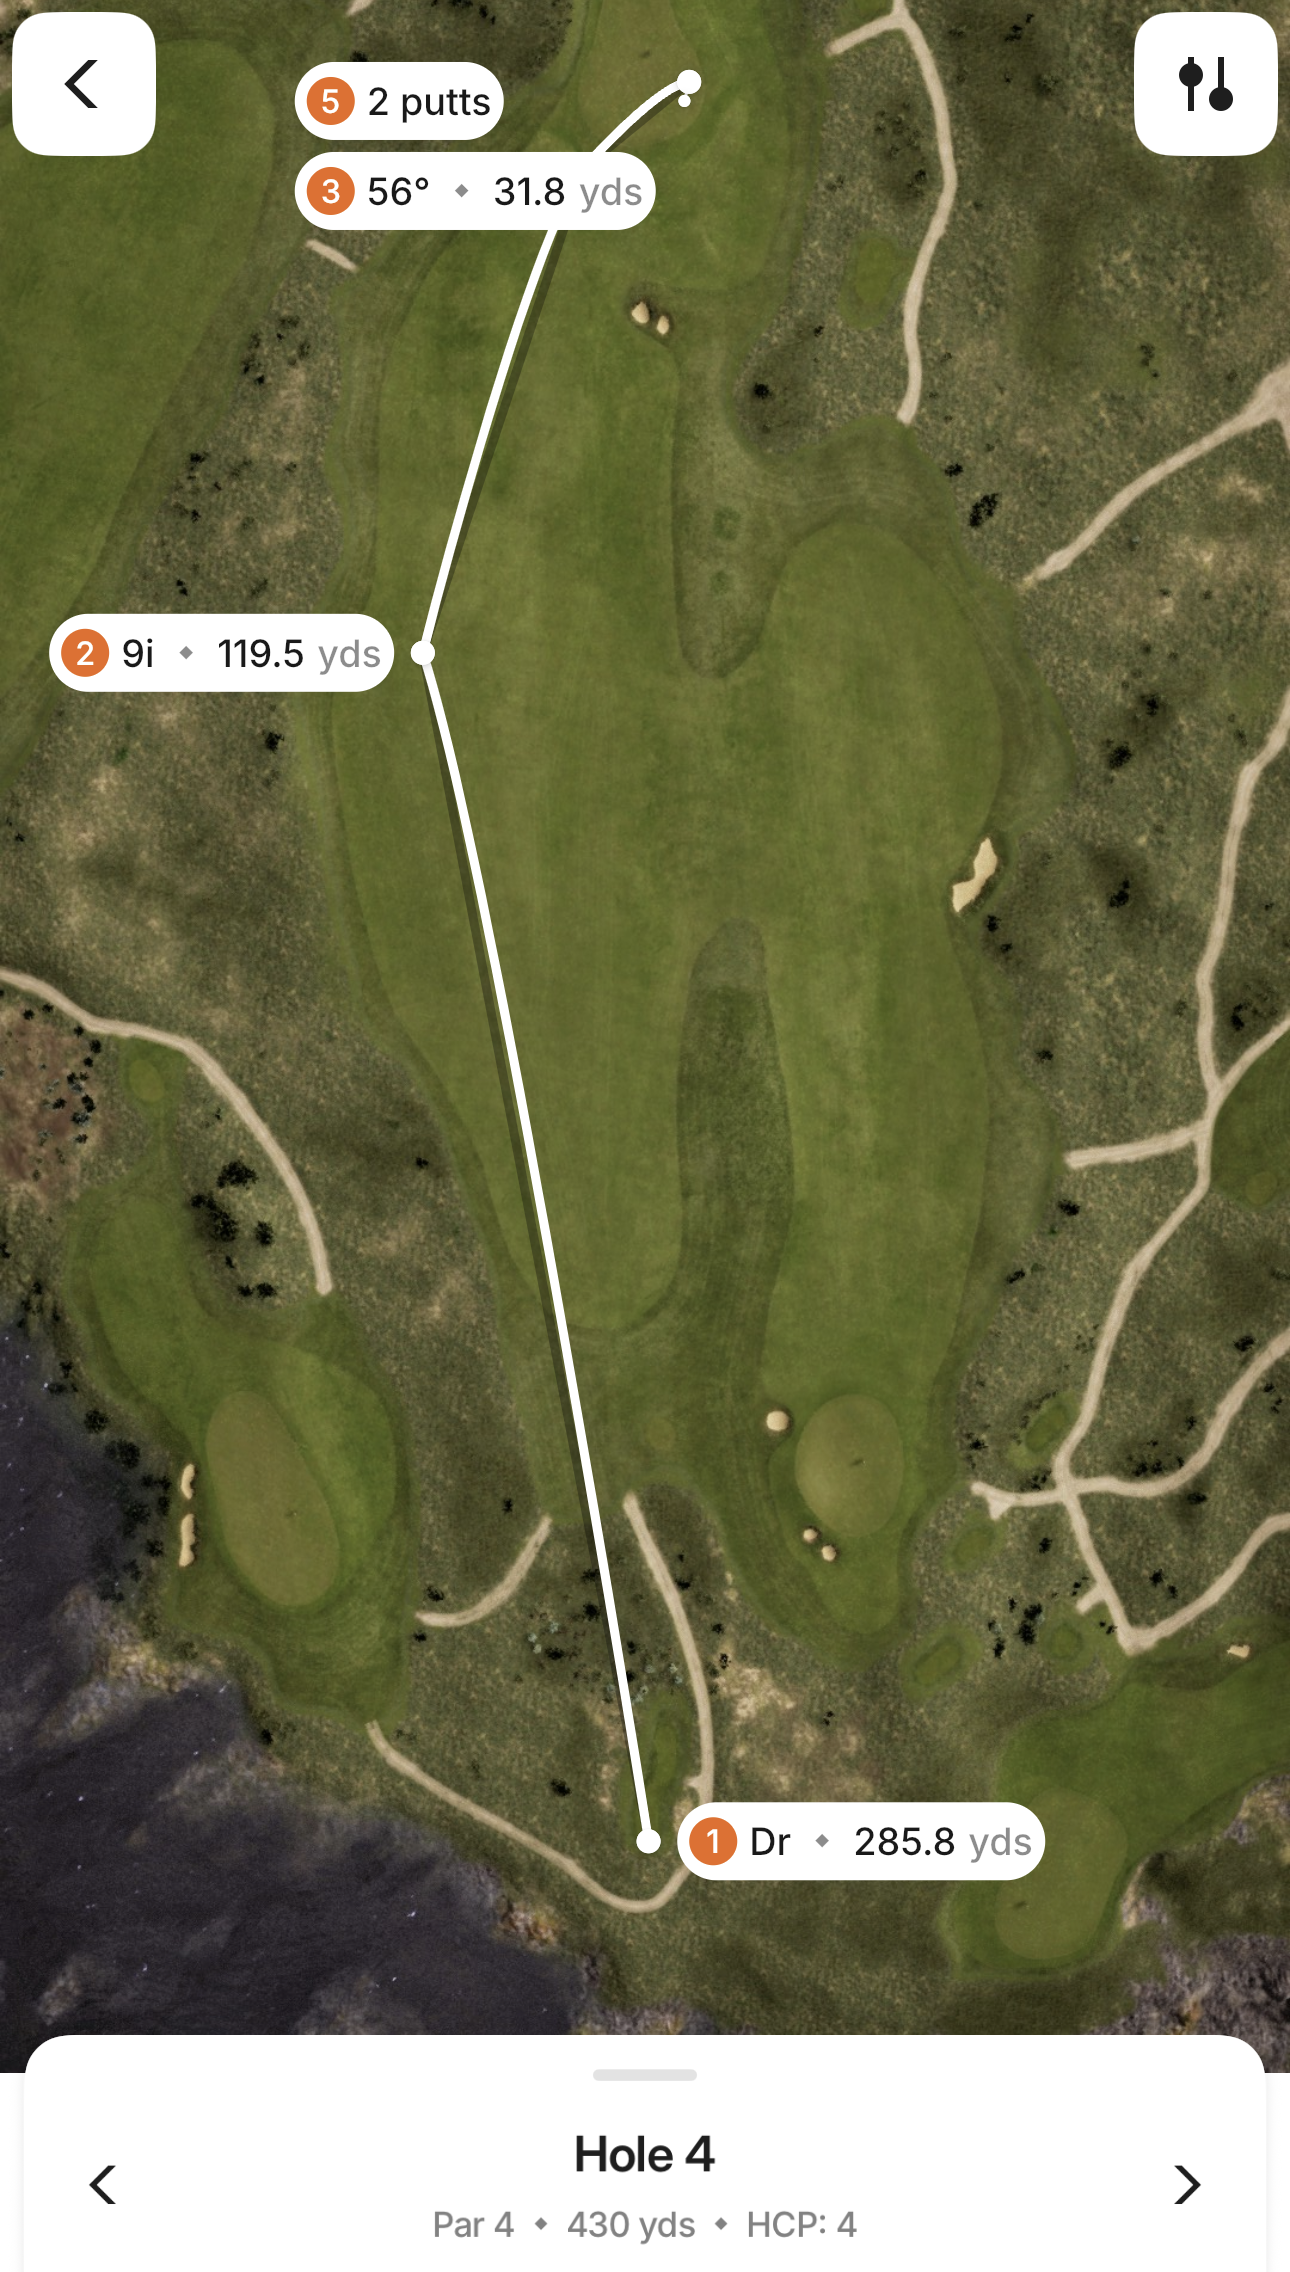
Hole 4
Aim just right of the lighthouse off the tee, then allow plenty of rollout on your approach.
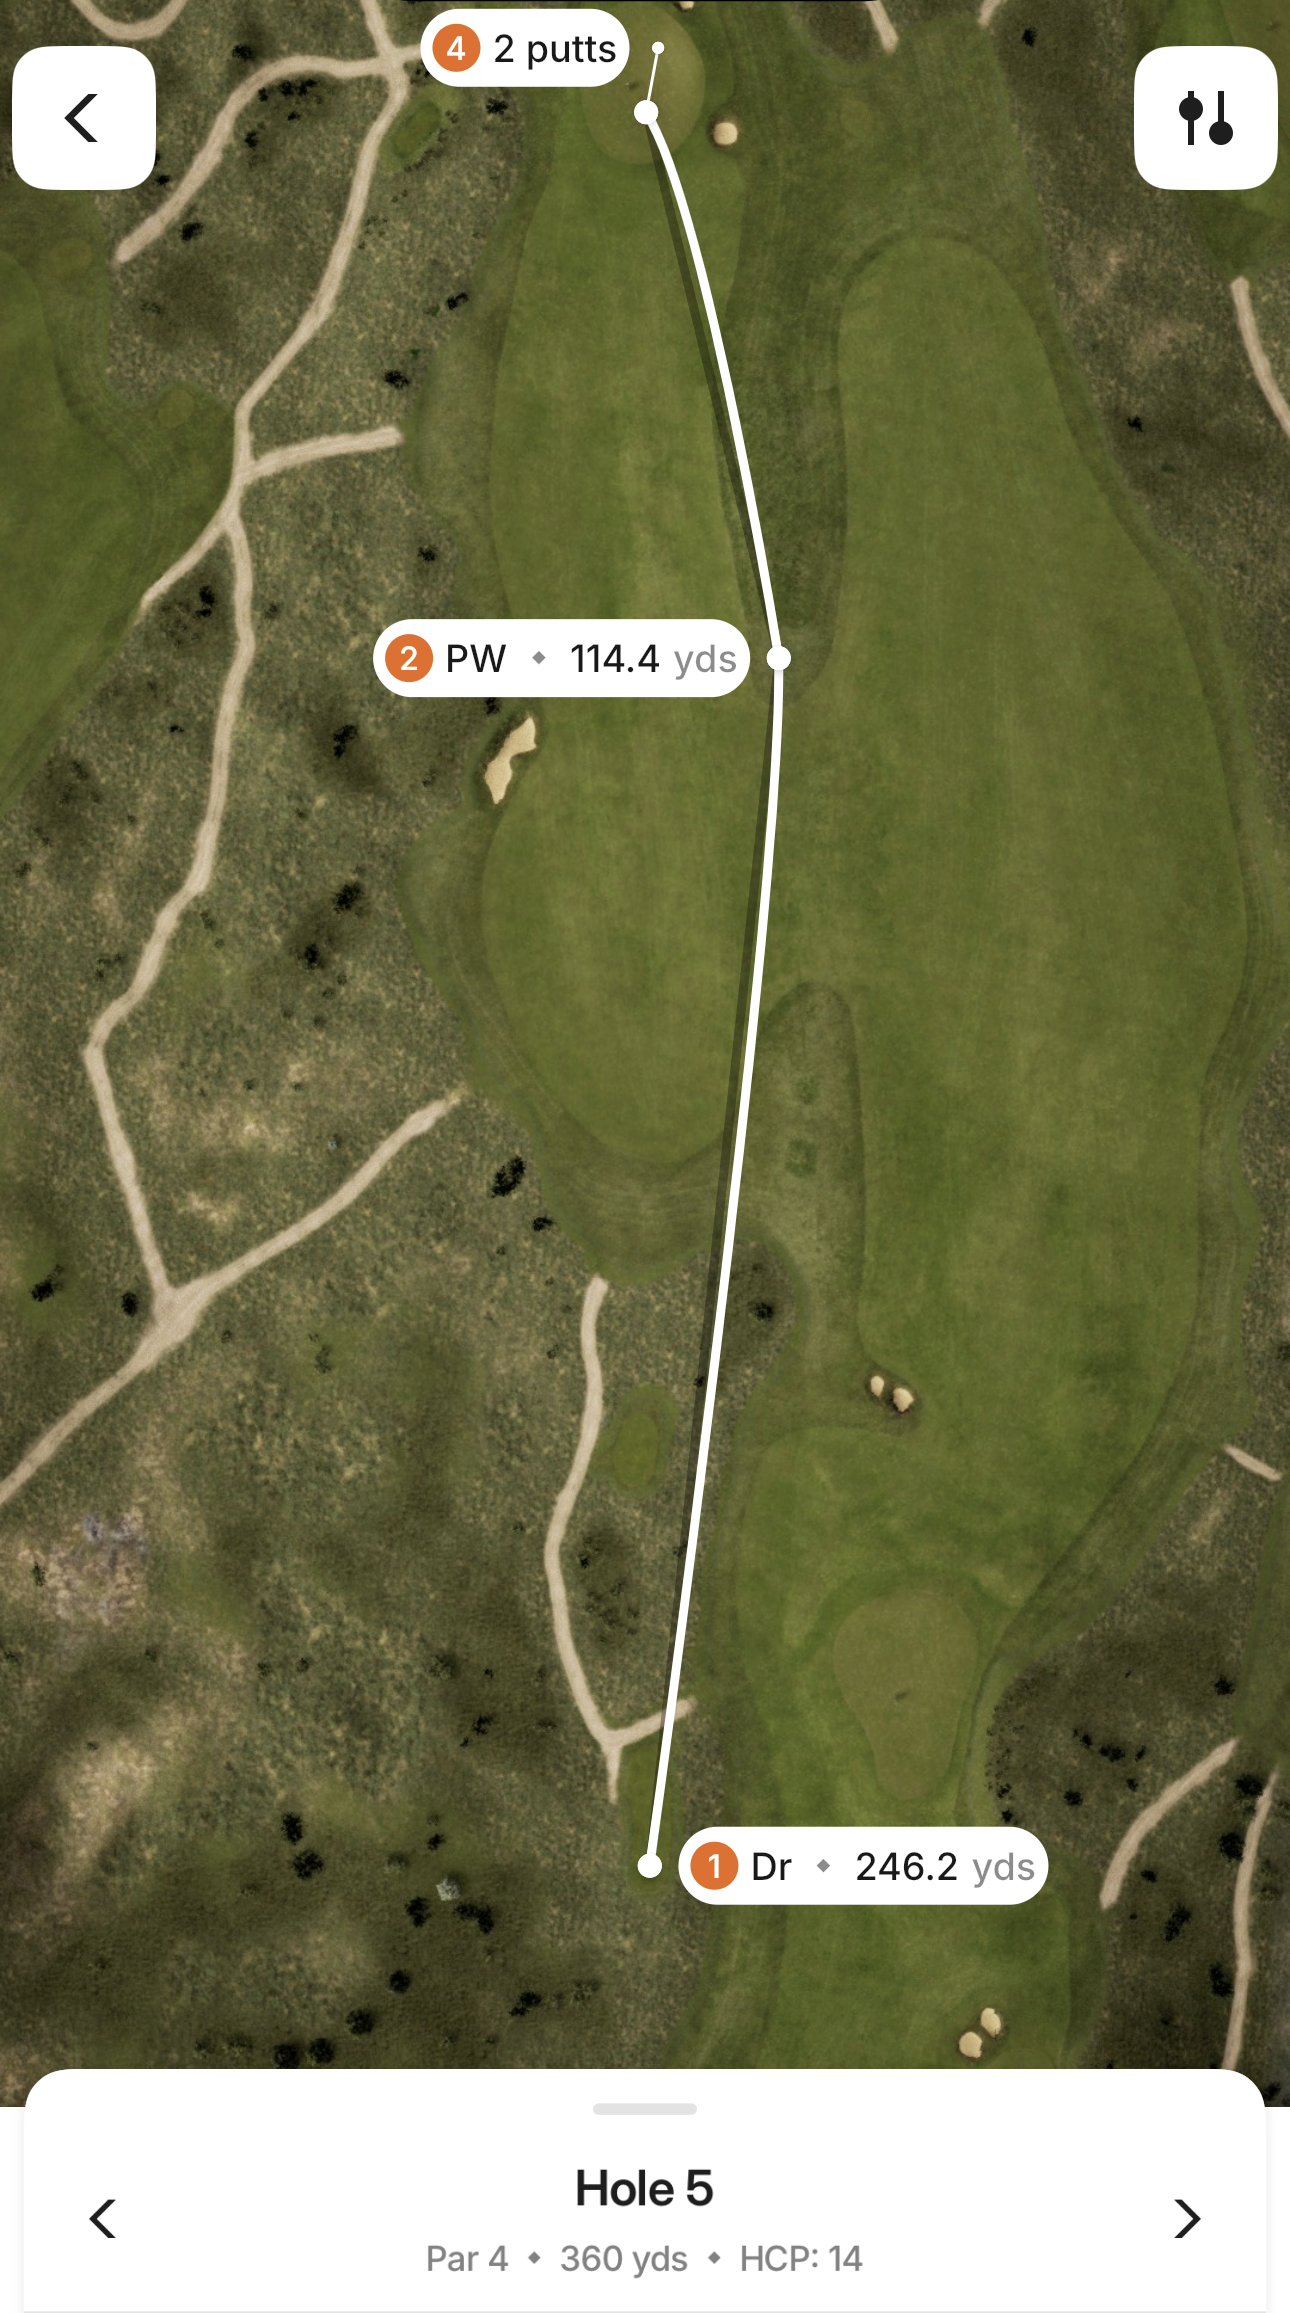
Hole 5
Prioritize accuracy between the fairway hazards, then use a running approach over the front mound.
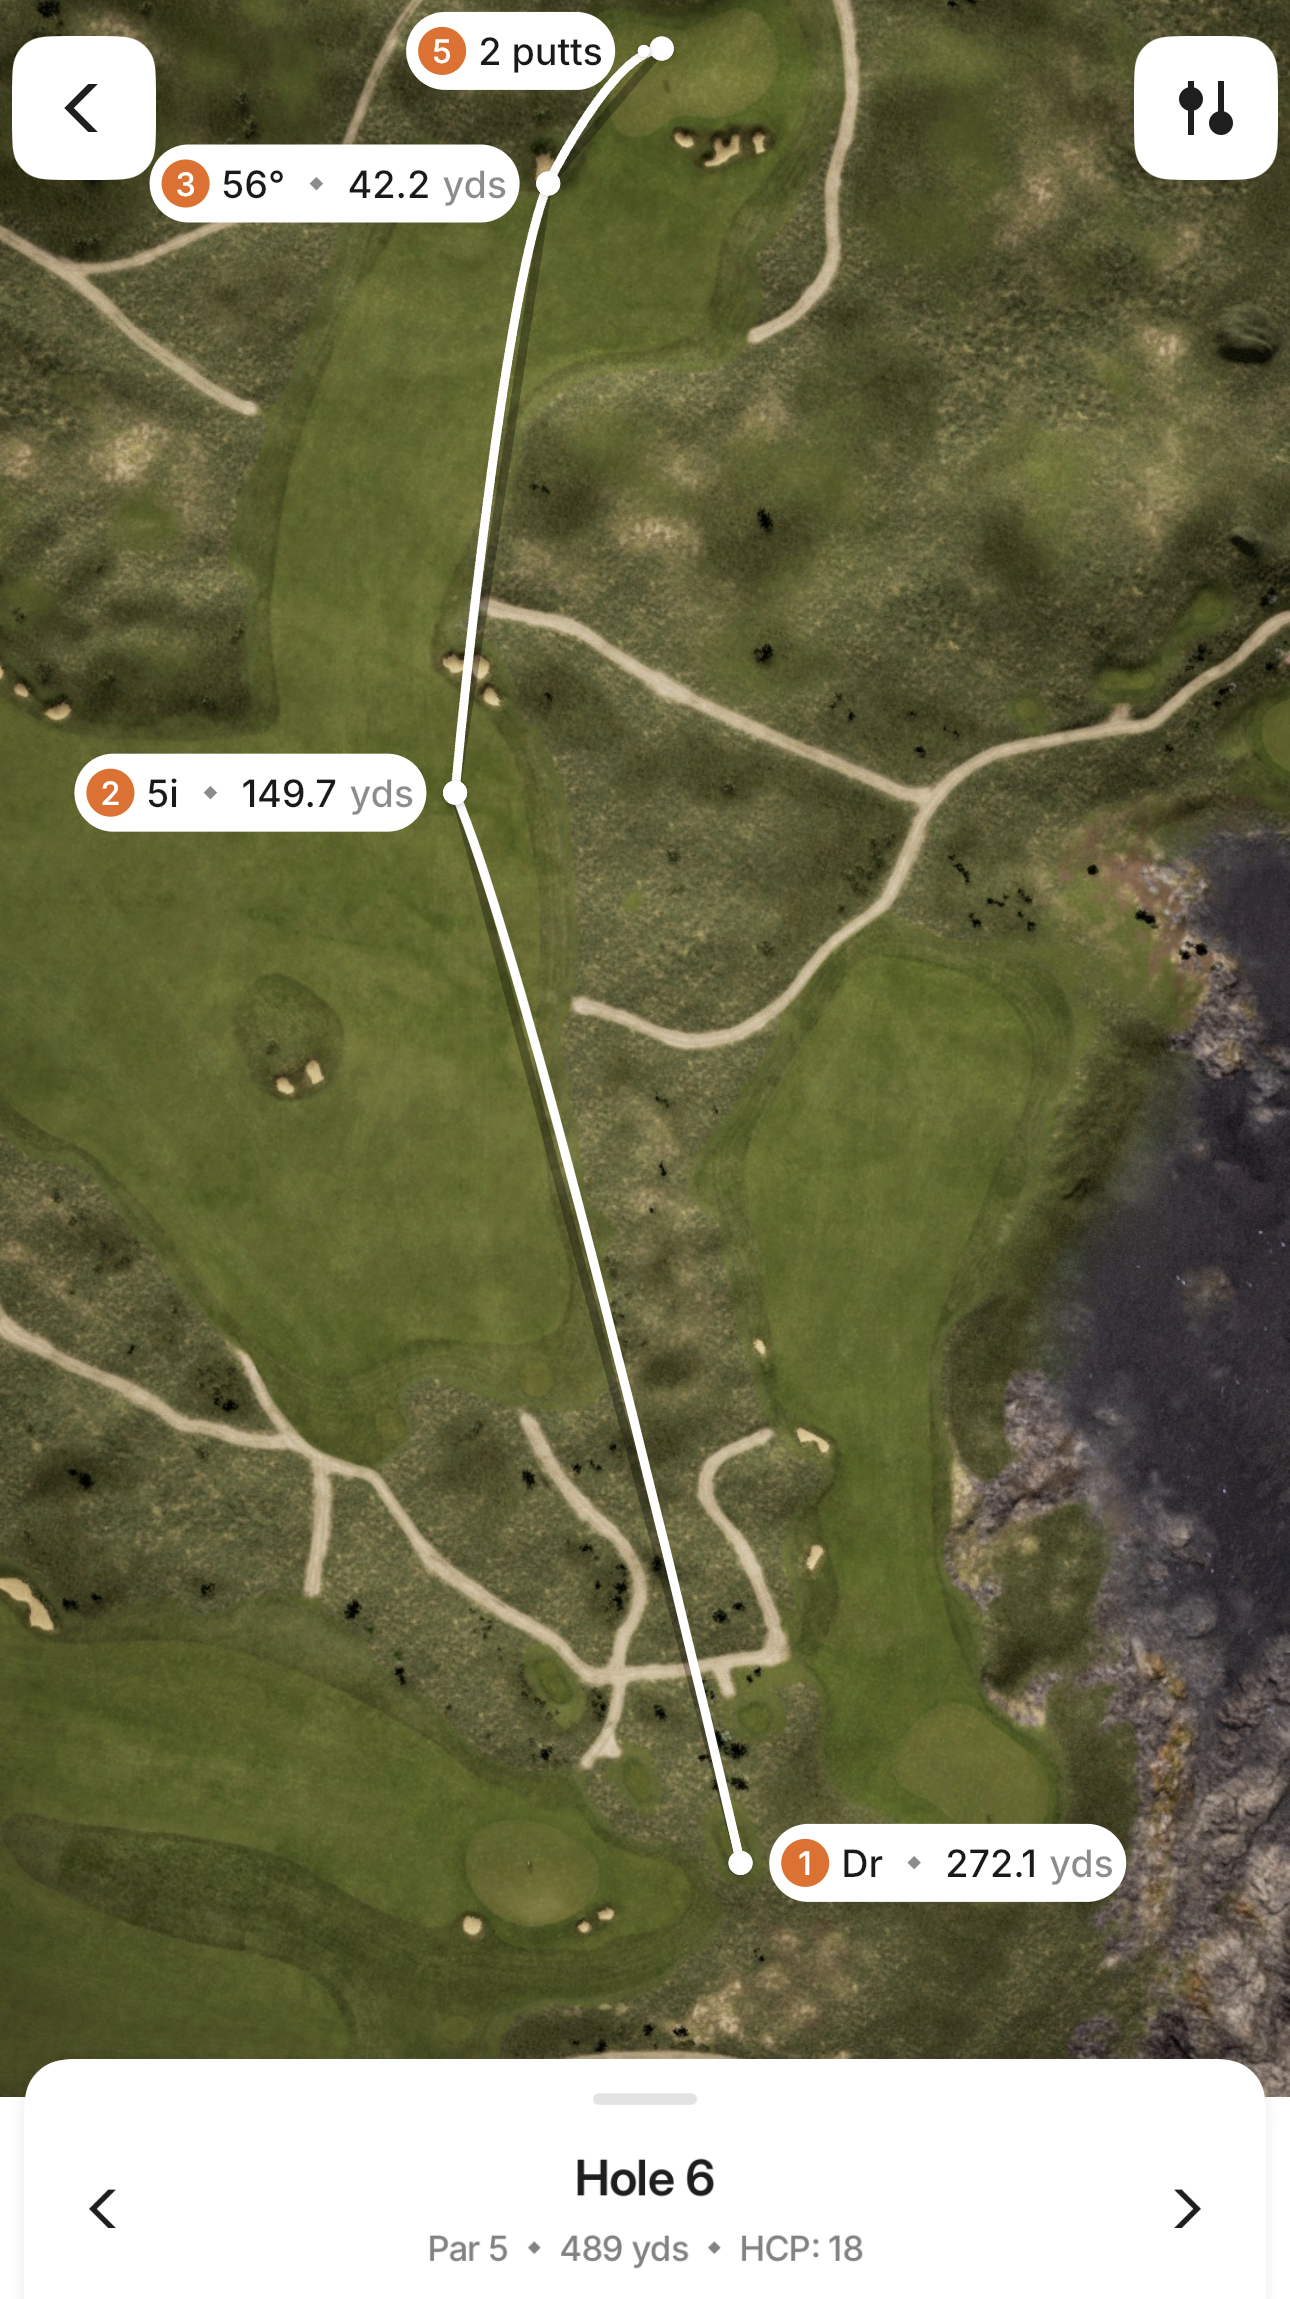
Hole 6
Follow the right dogleg and lay up for a comfortable pitch unless reaching in two is realistic.
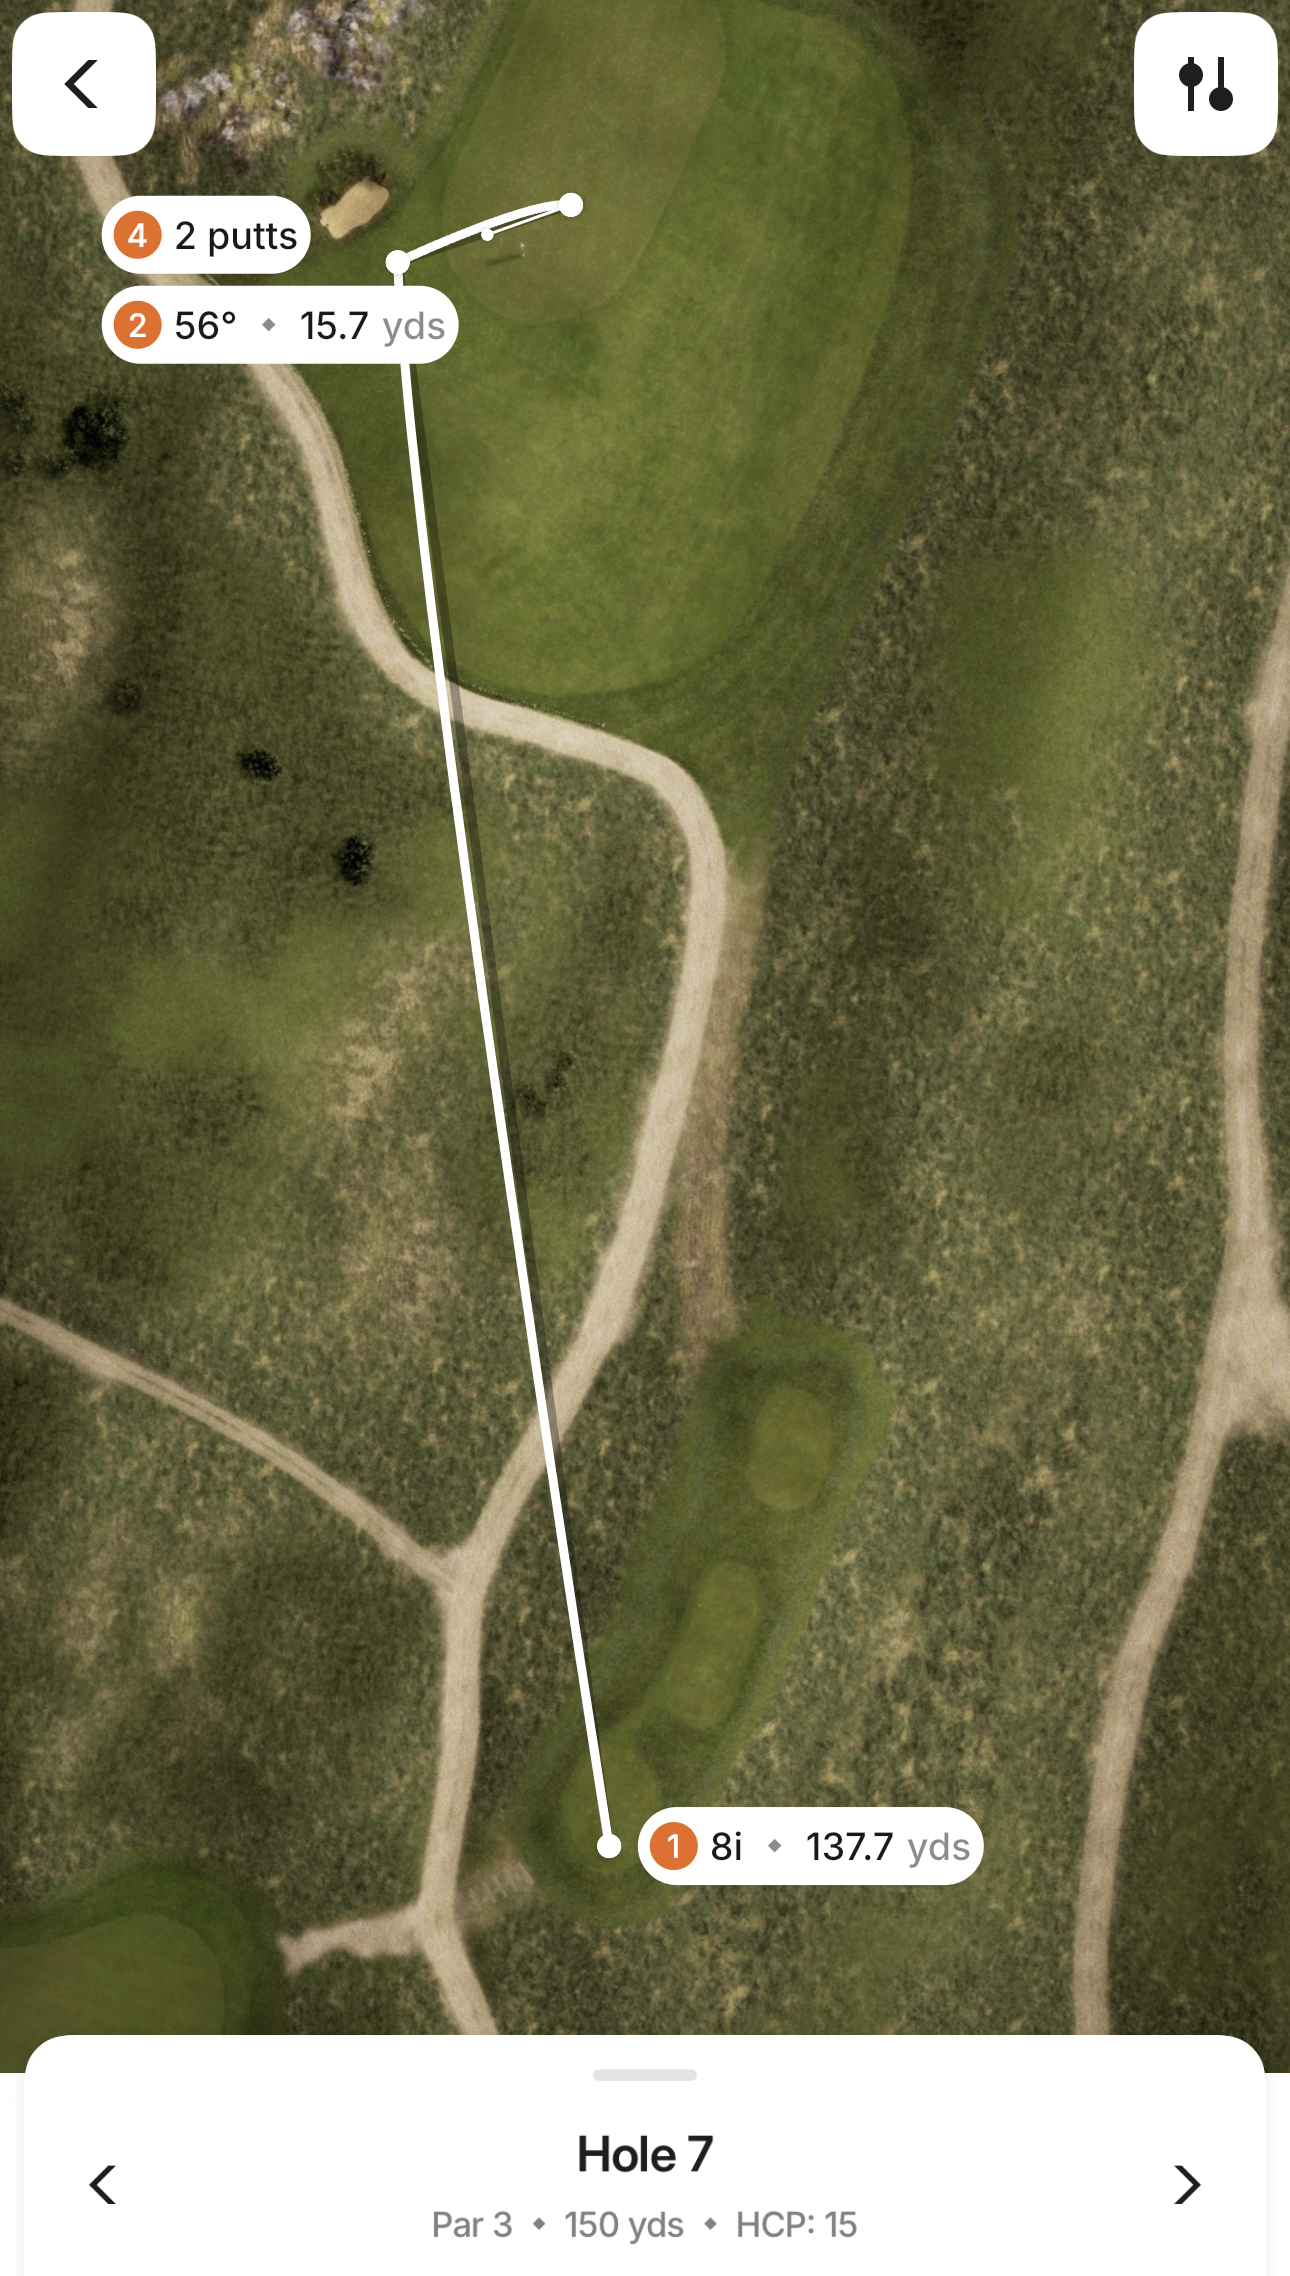
Hole 7
Target the center of the two-tier green and avoid the deep hollow on the right.
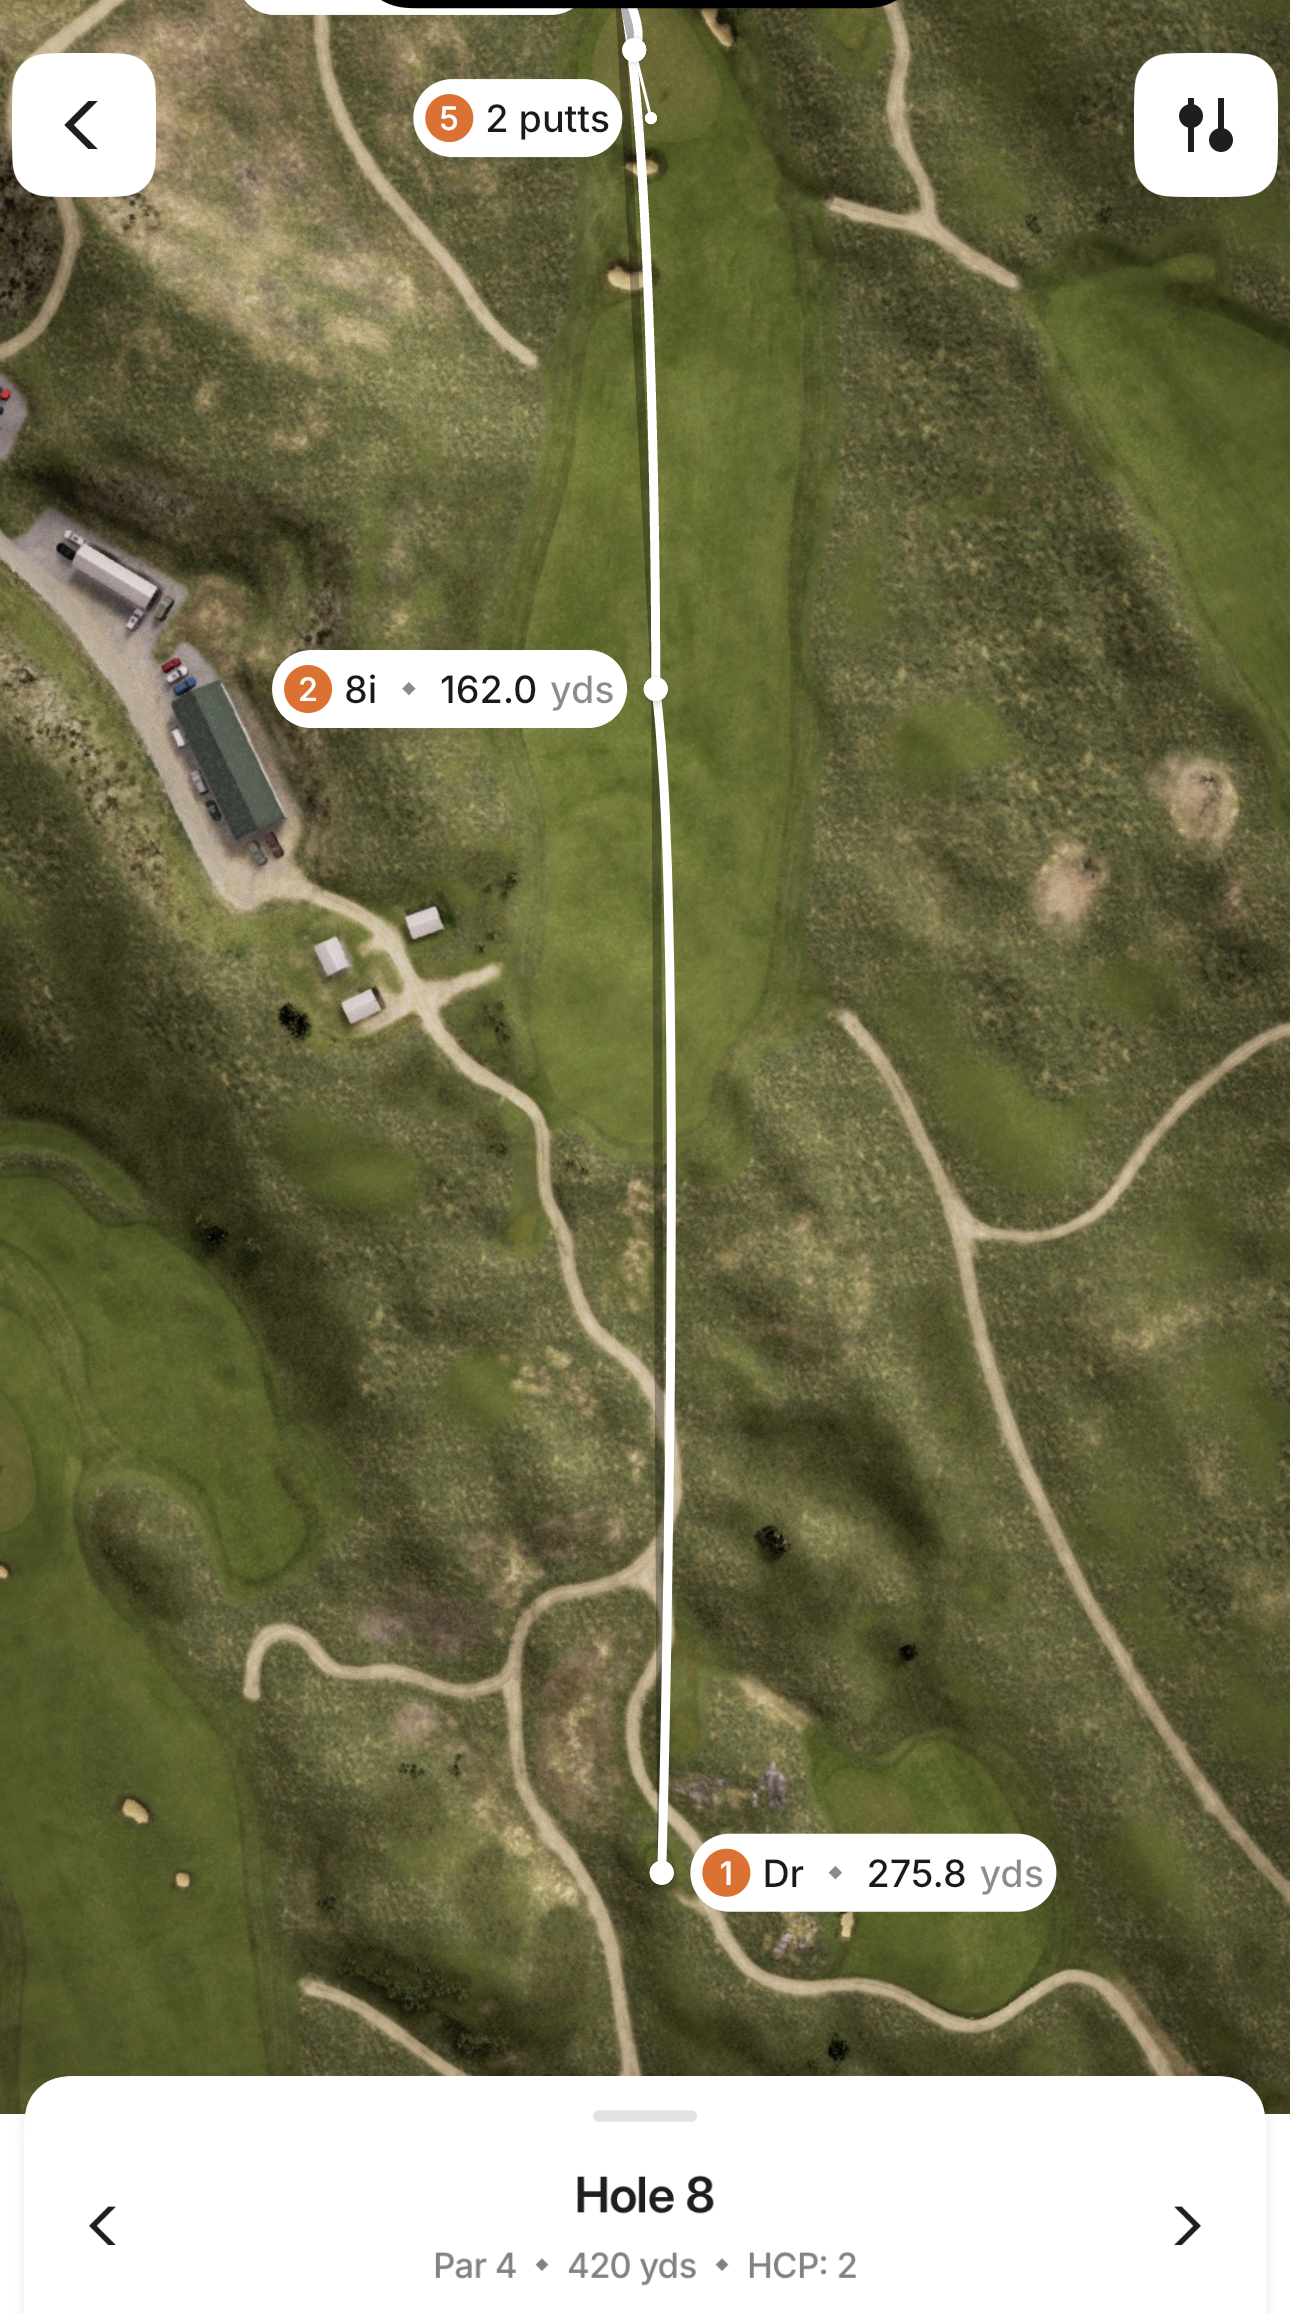
Hole 8
Trust the aiming post over the blind crest, then judge the uphill approach to a firm green.
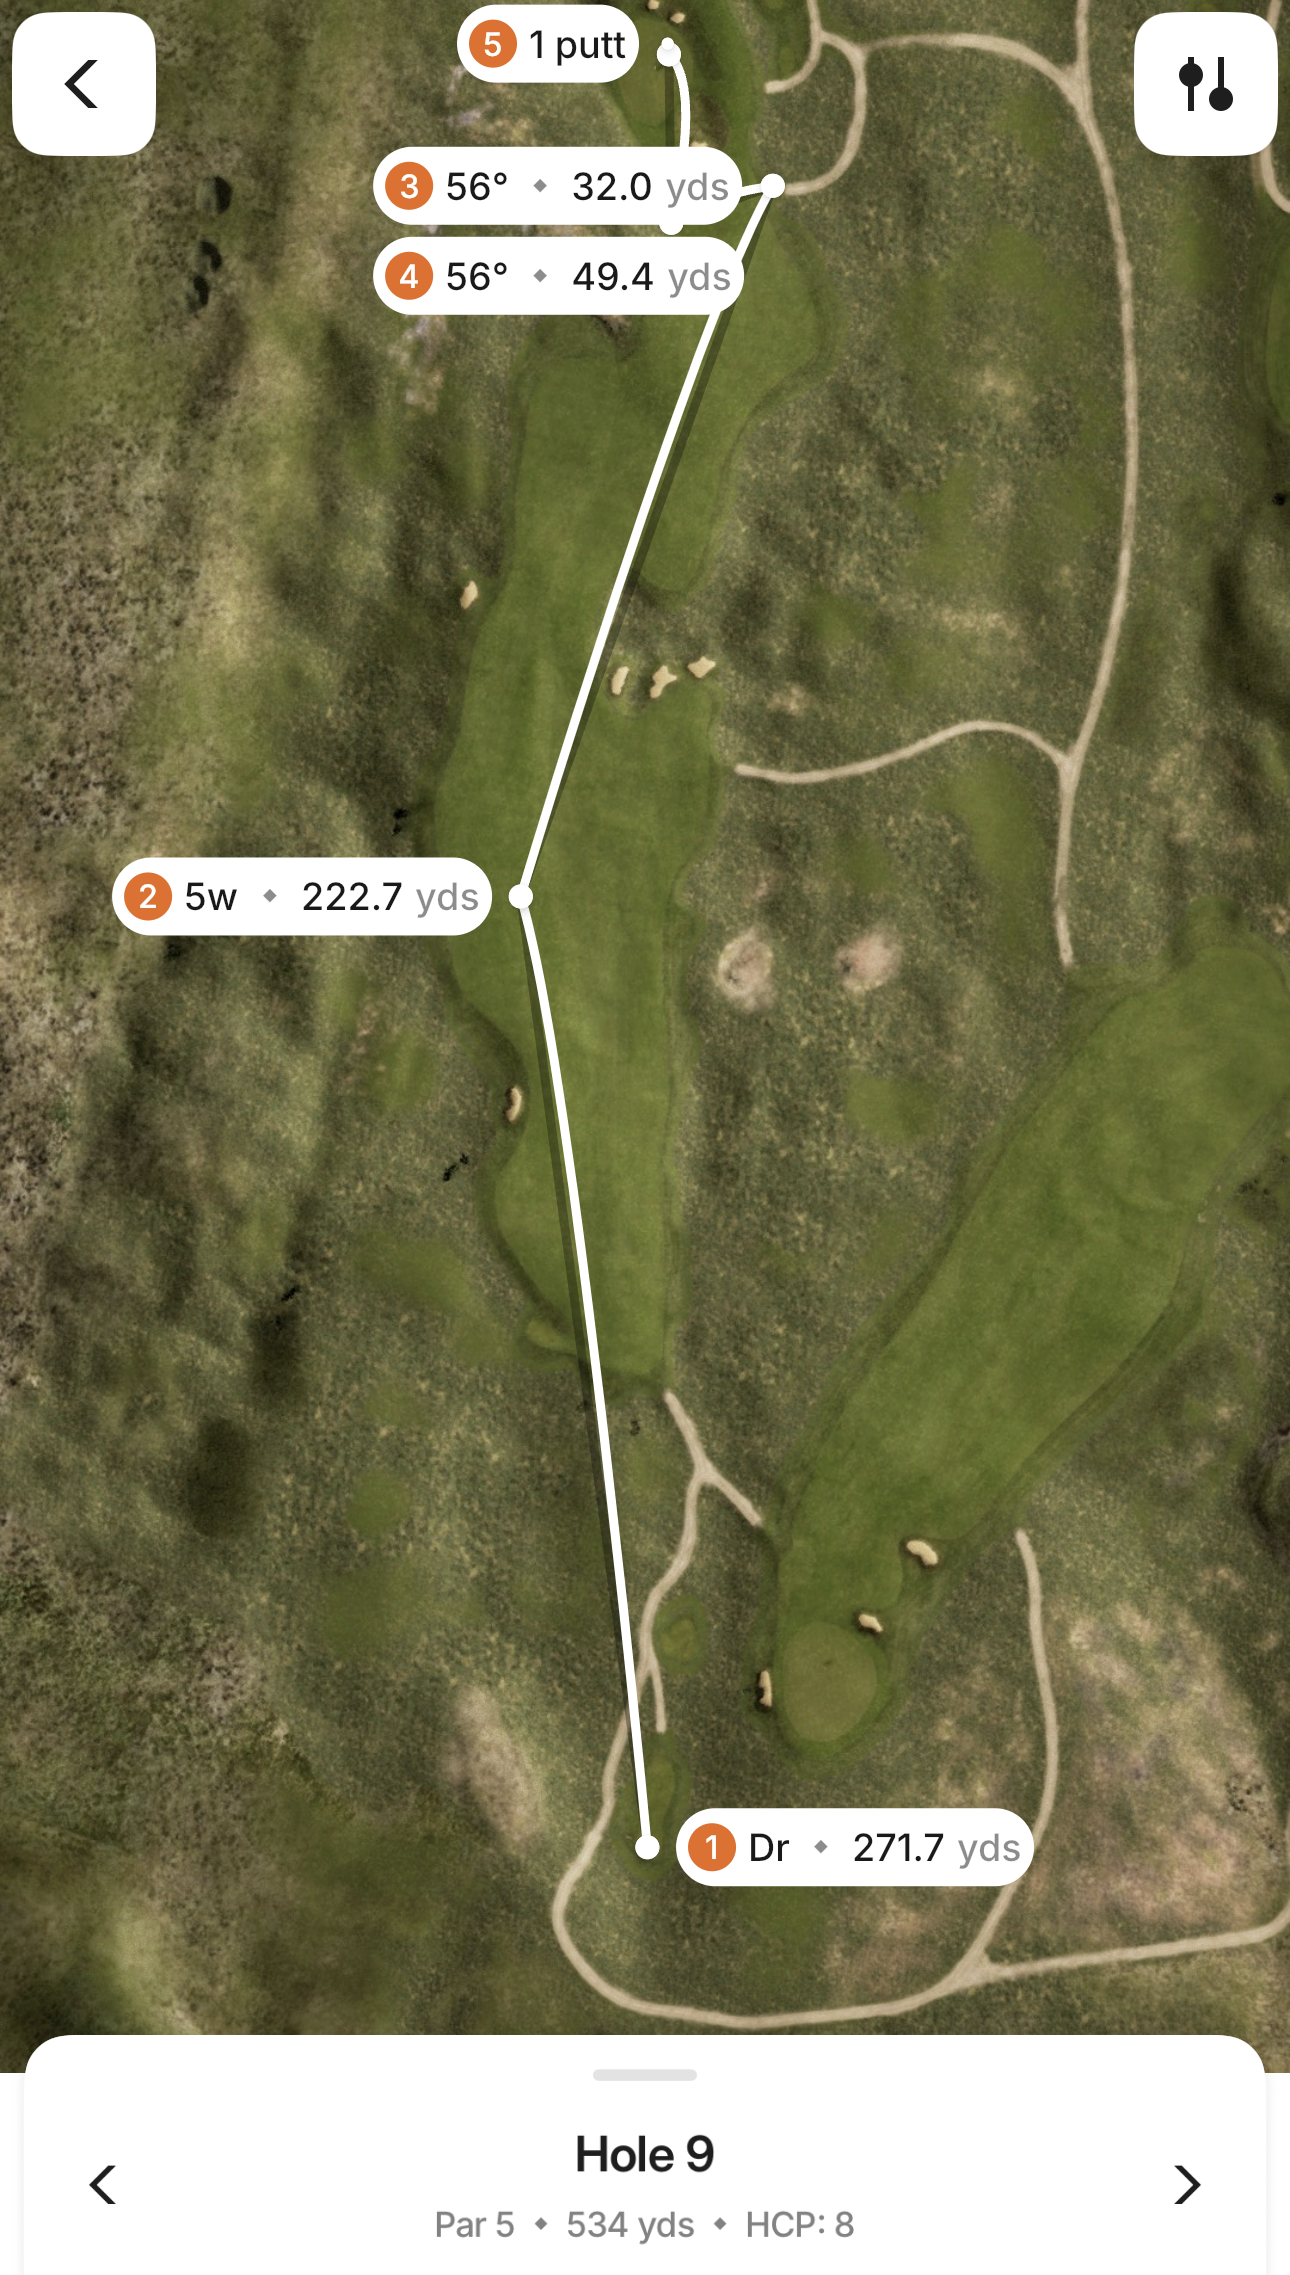
Hole 9
Favor the lower left fairway, then lay up in the valley right for an uphill pitch.
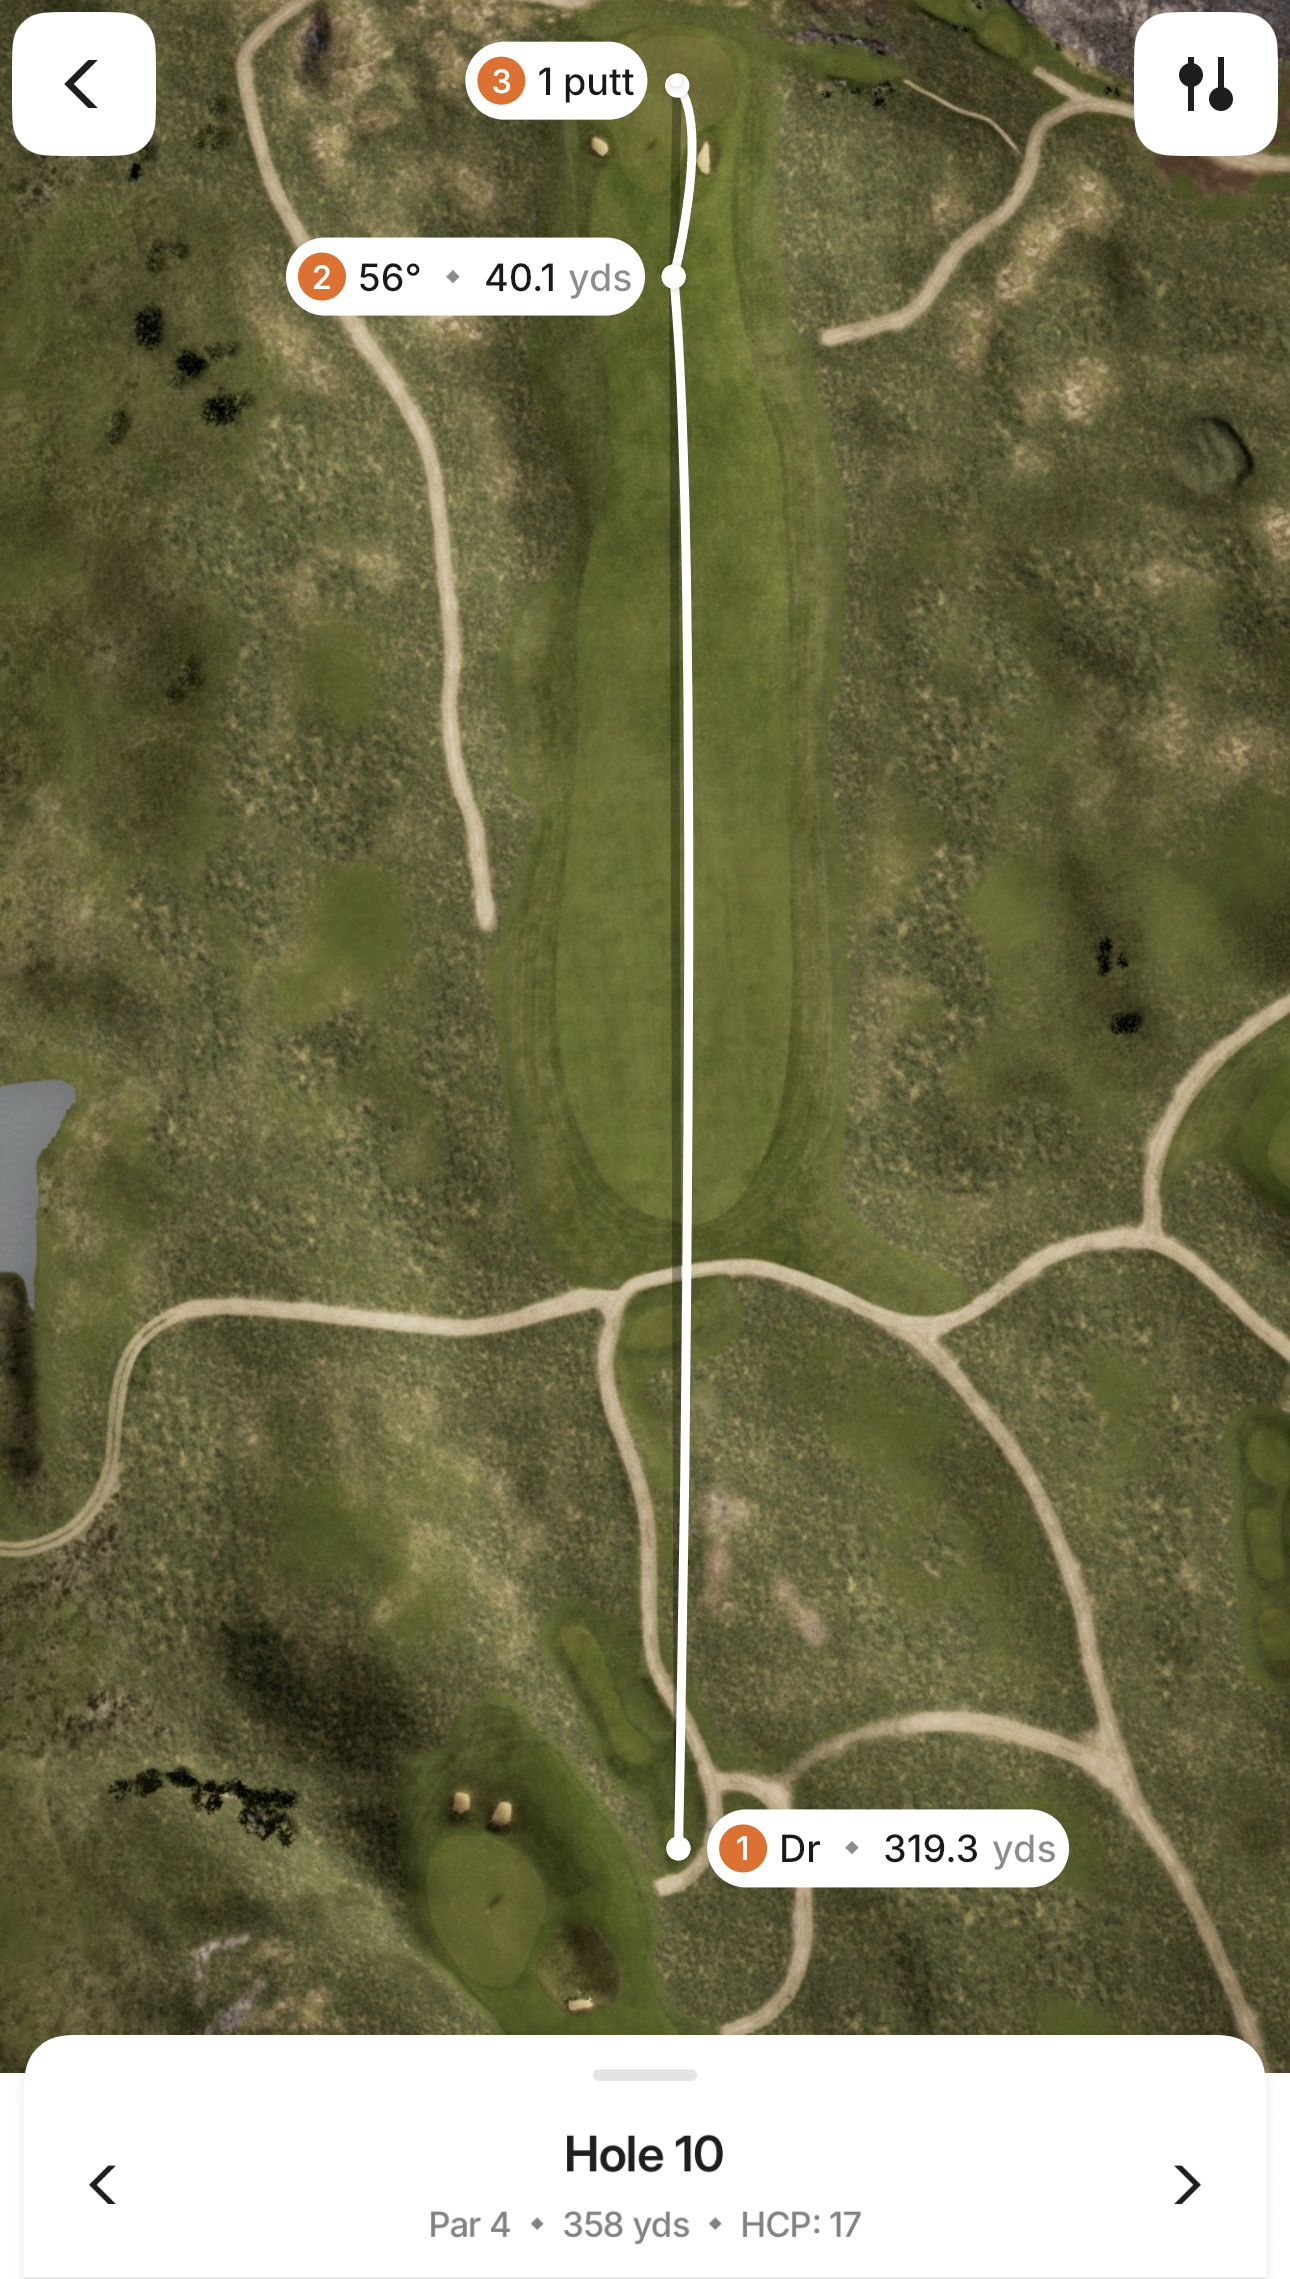
Hole 10
Drive between the distant mounds, then use the green contours to feed your pitch toward the flag.
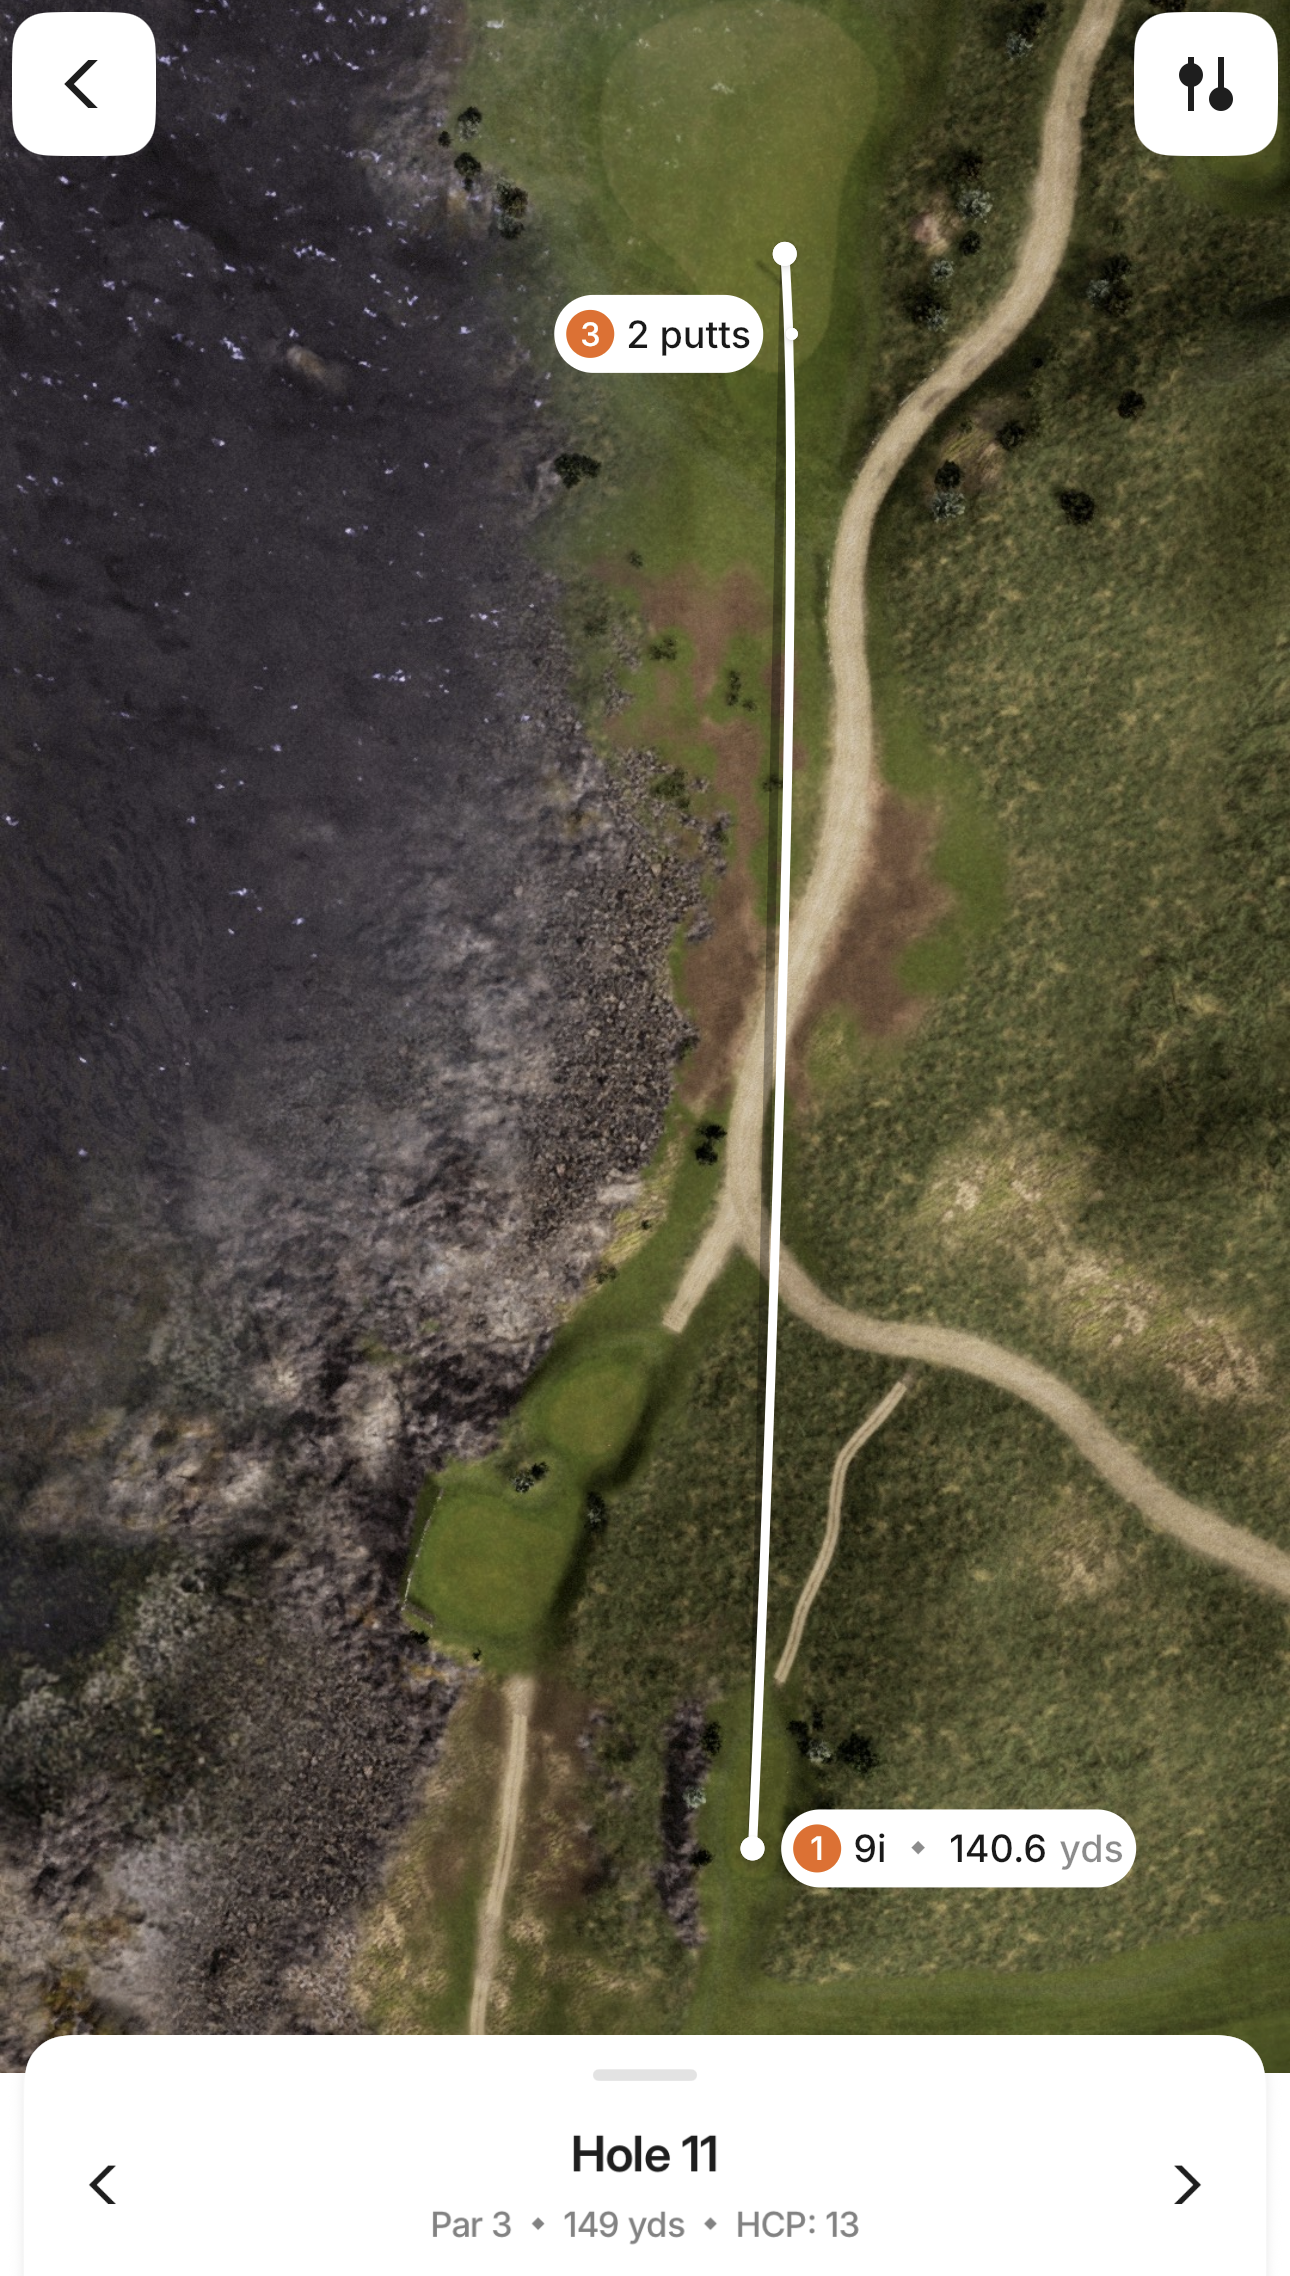
Hole 11
Adjust for the coastal wind and commit to the middle of the green; misses leave little room.
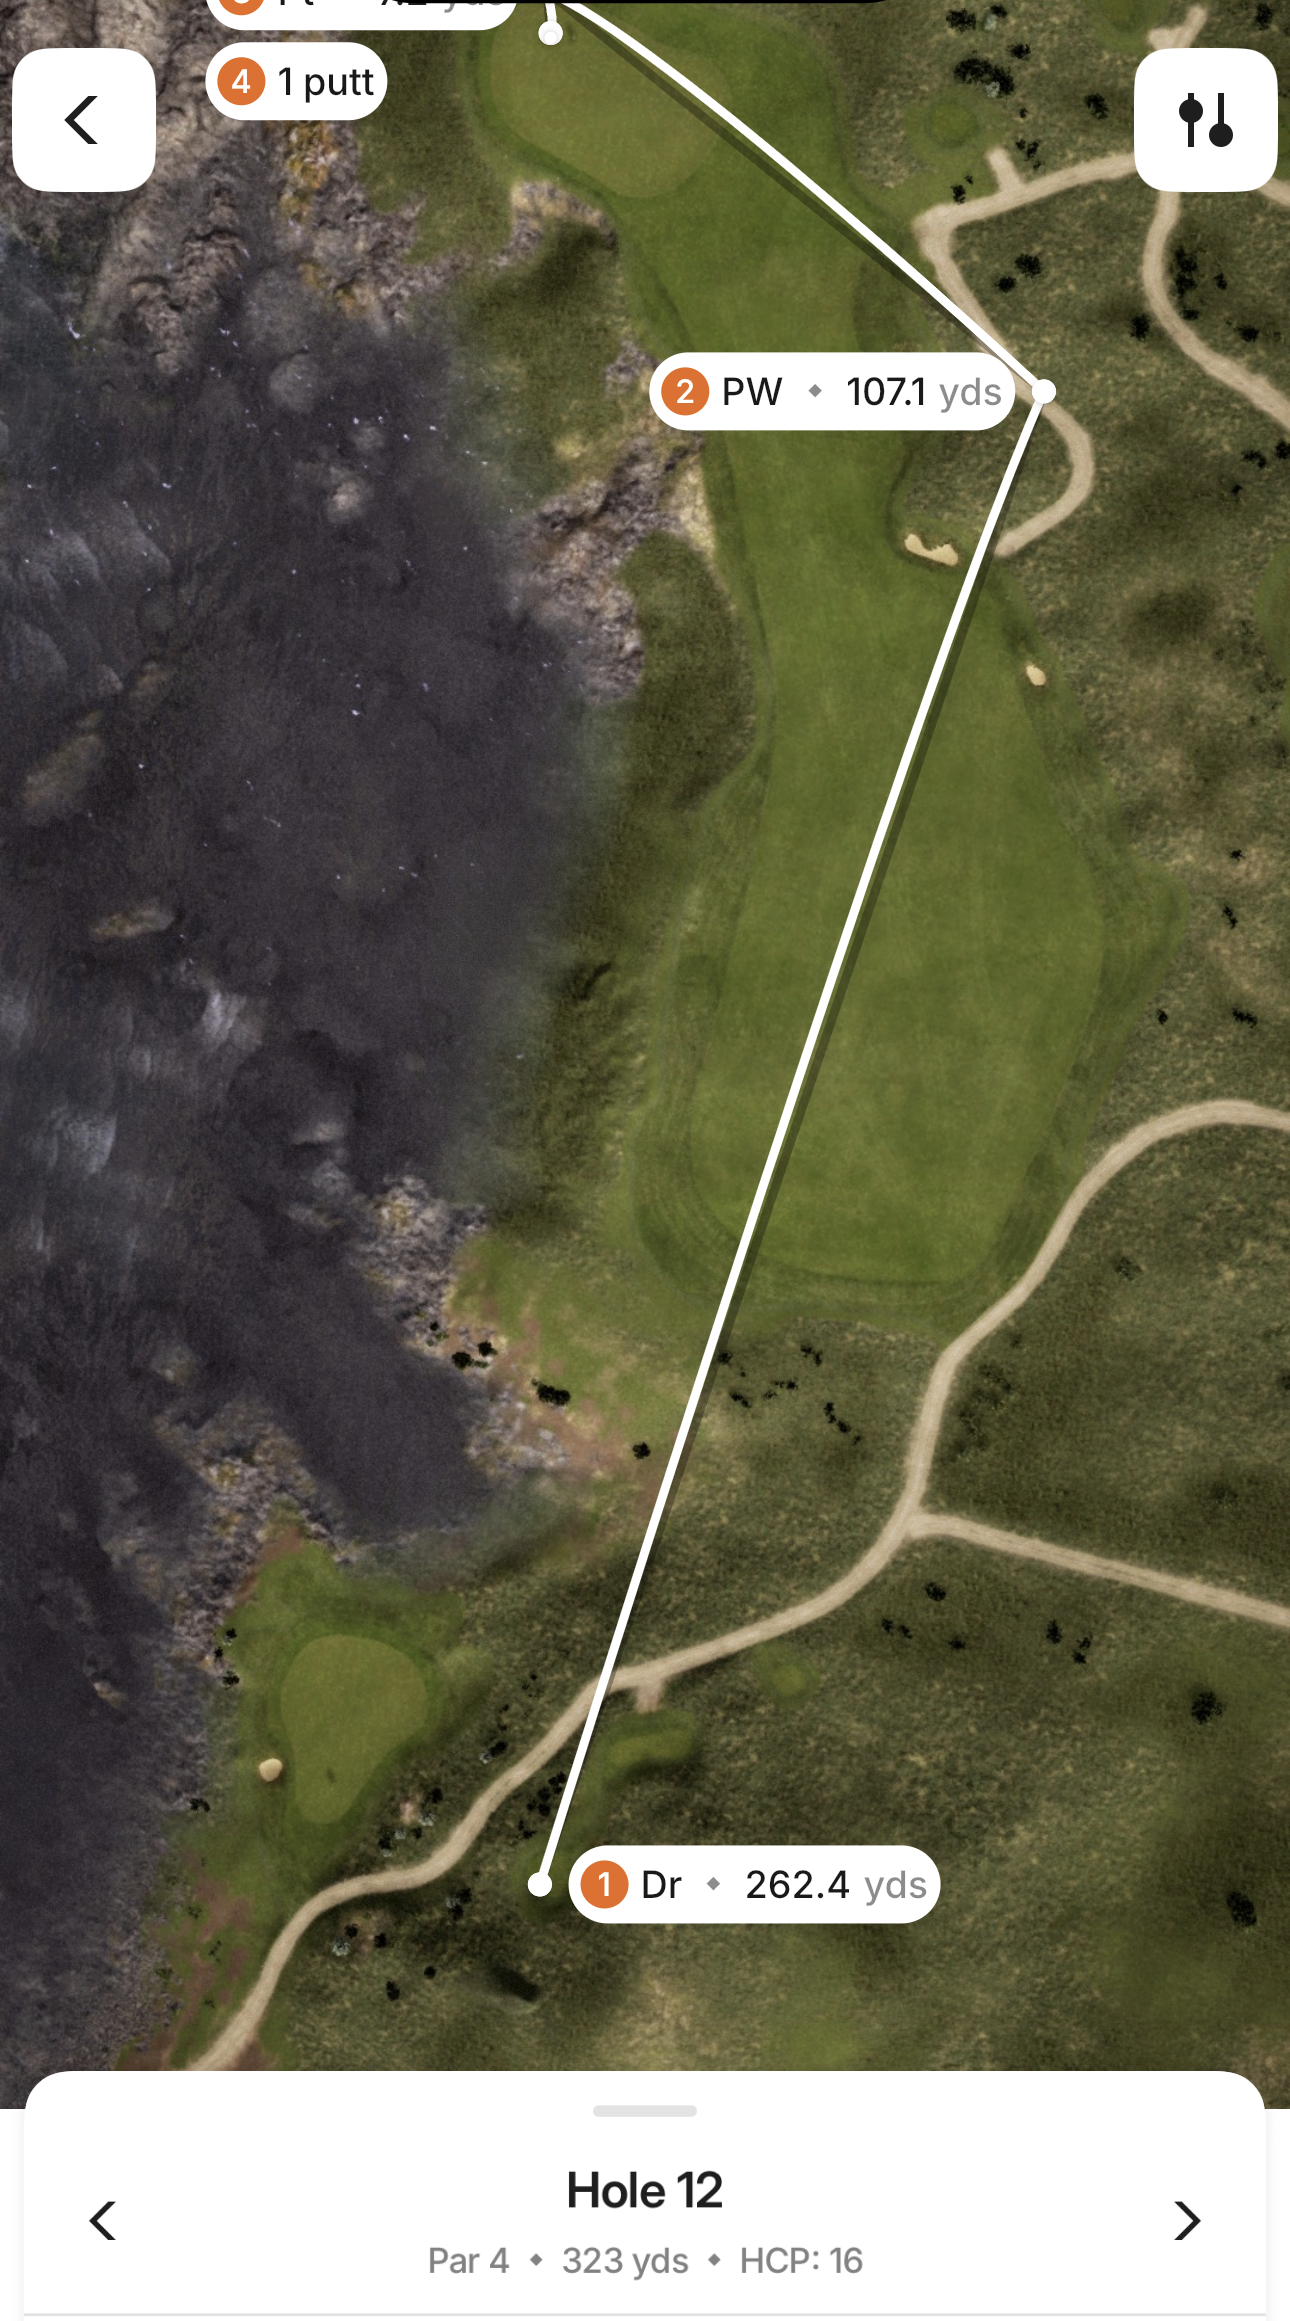
Hole 12
Lay up before the fairway narrows, then approach from the right to use the slope and avoid the cliffs.
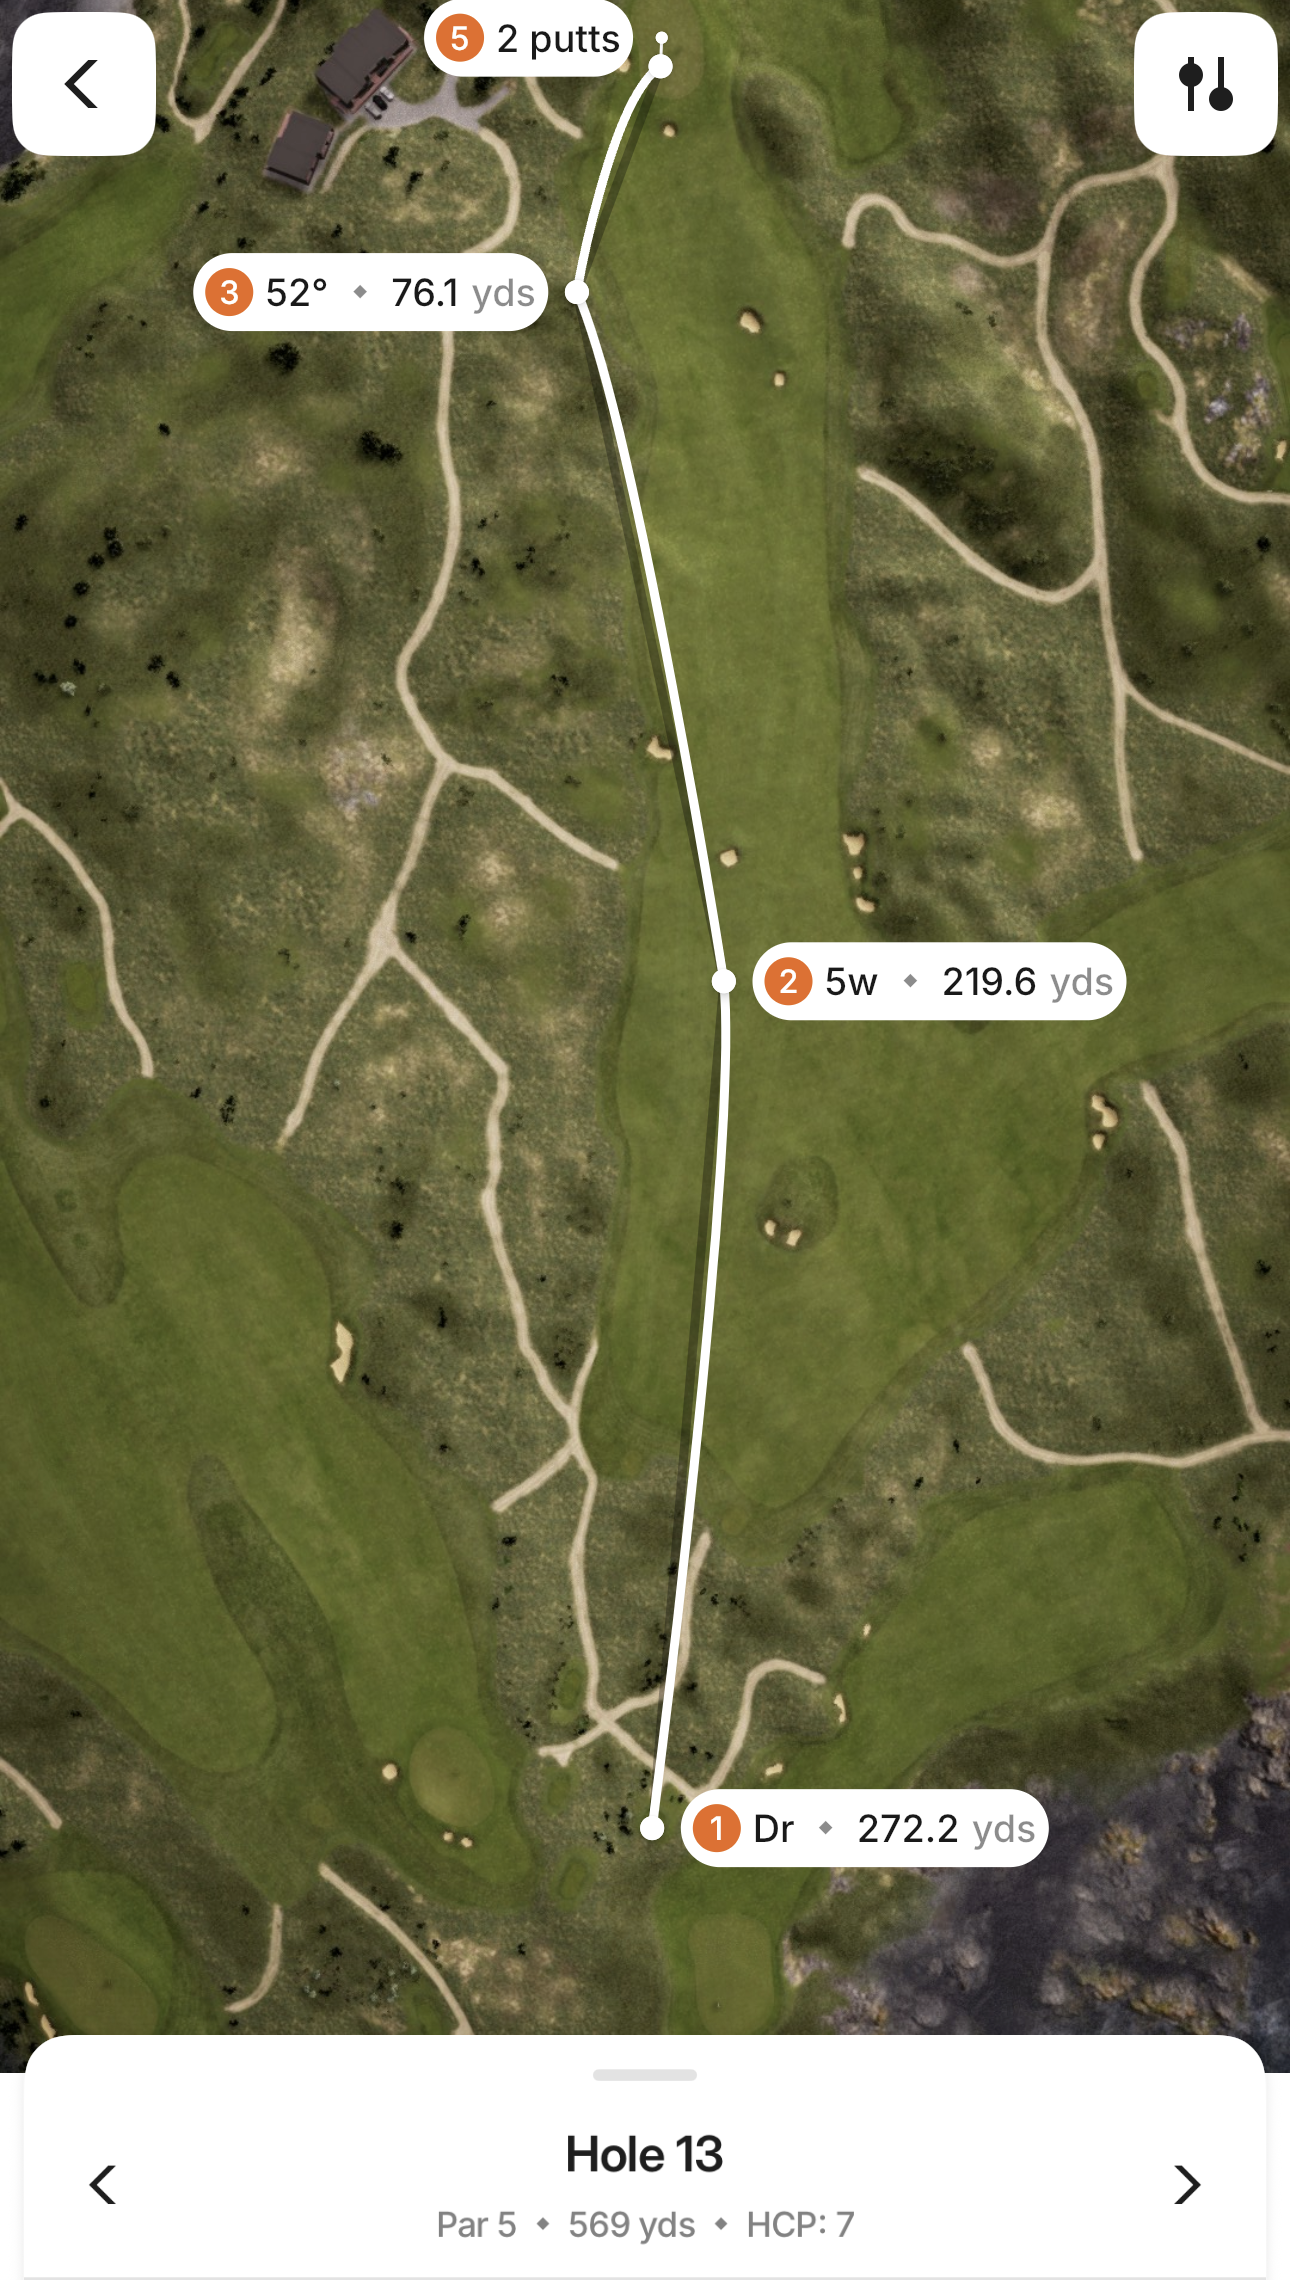
Hole 13
Start right of the central fairway bunker and favor controlled advances over chasing distance on this long par five.
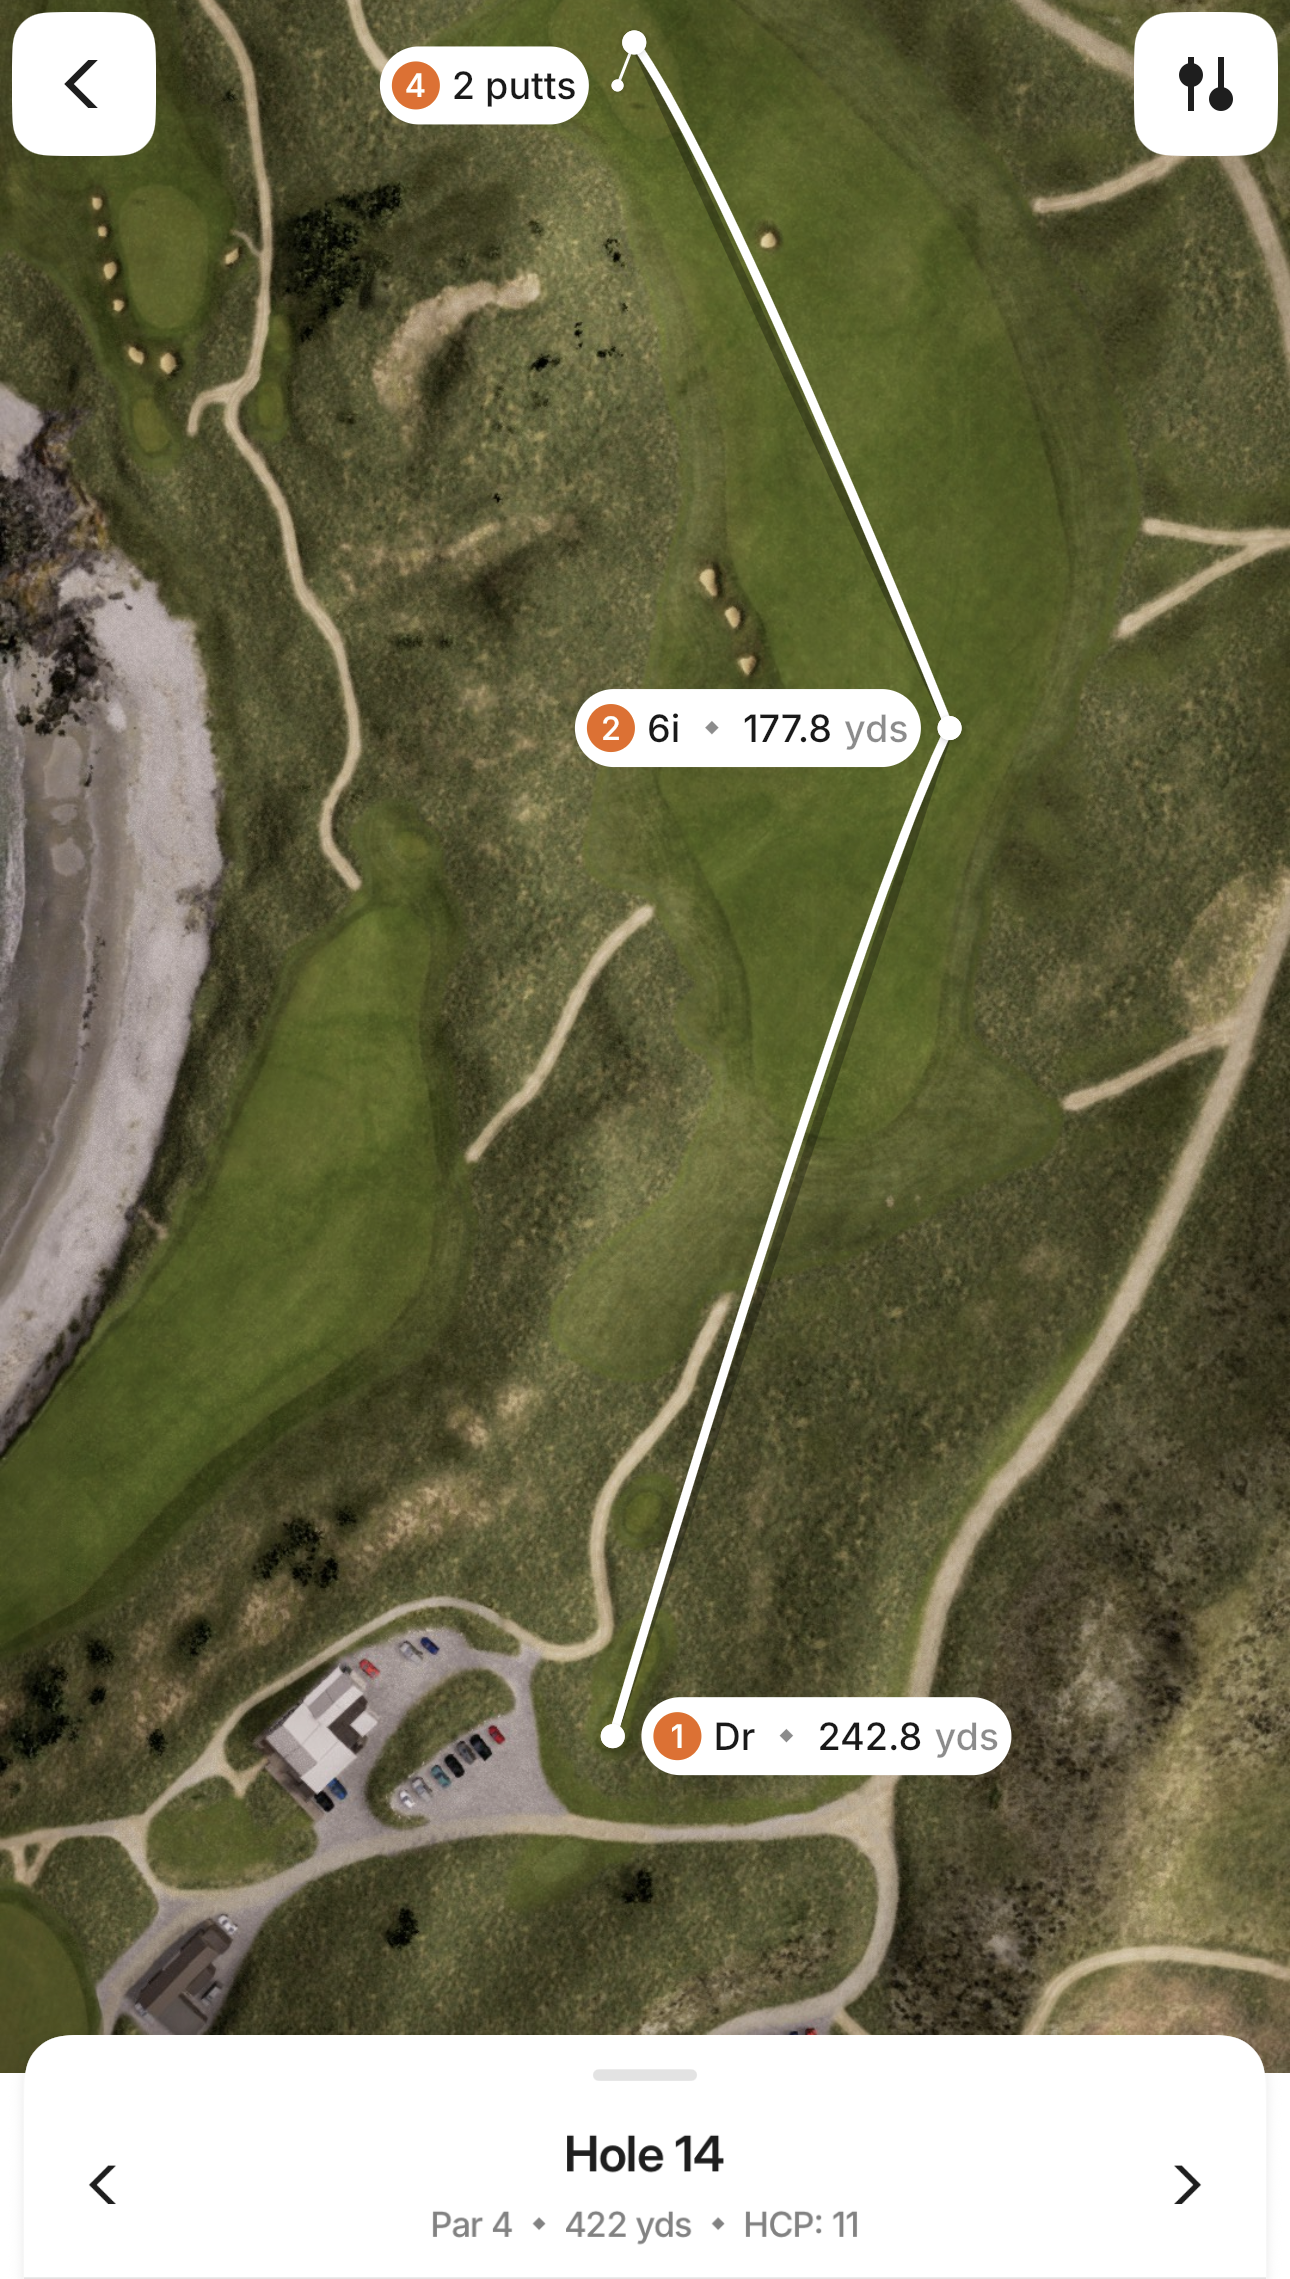
Hole 14
Use the generous fairway right of the bunkers, then allow the approach to feed left down the slope.
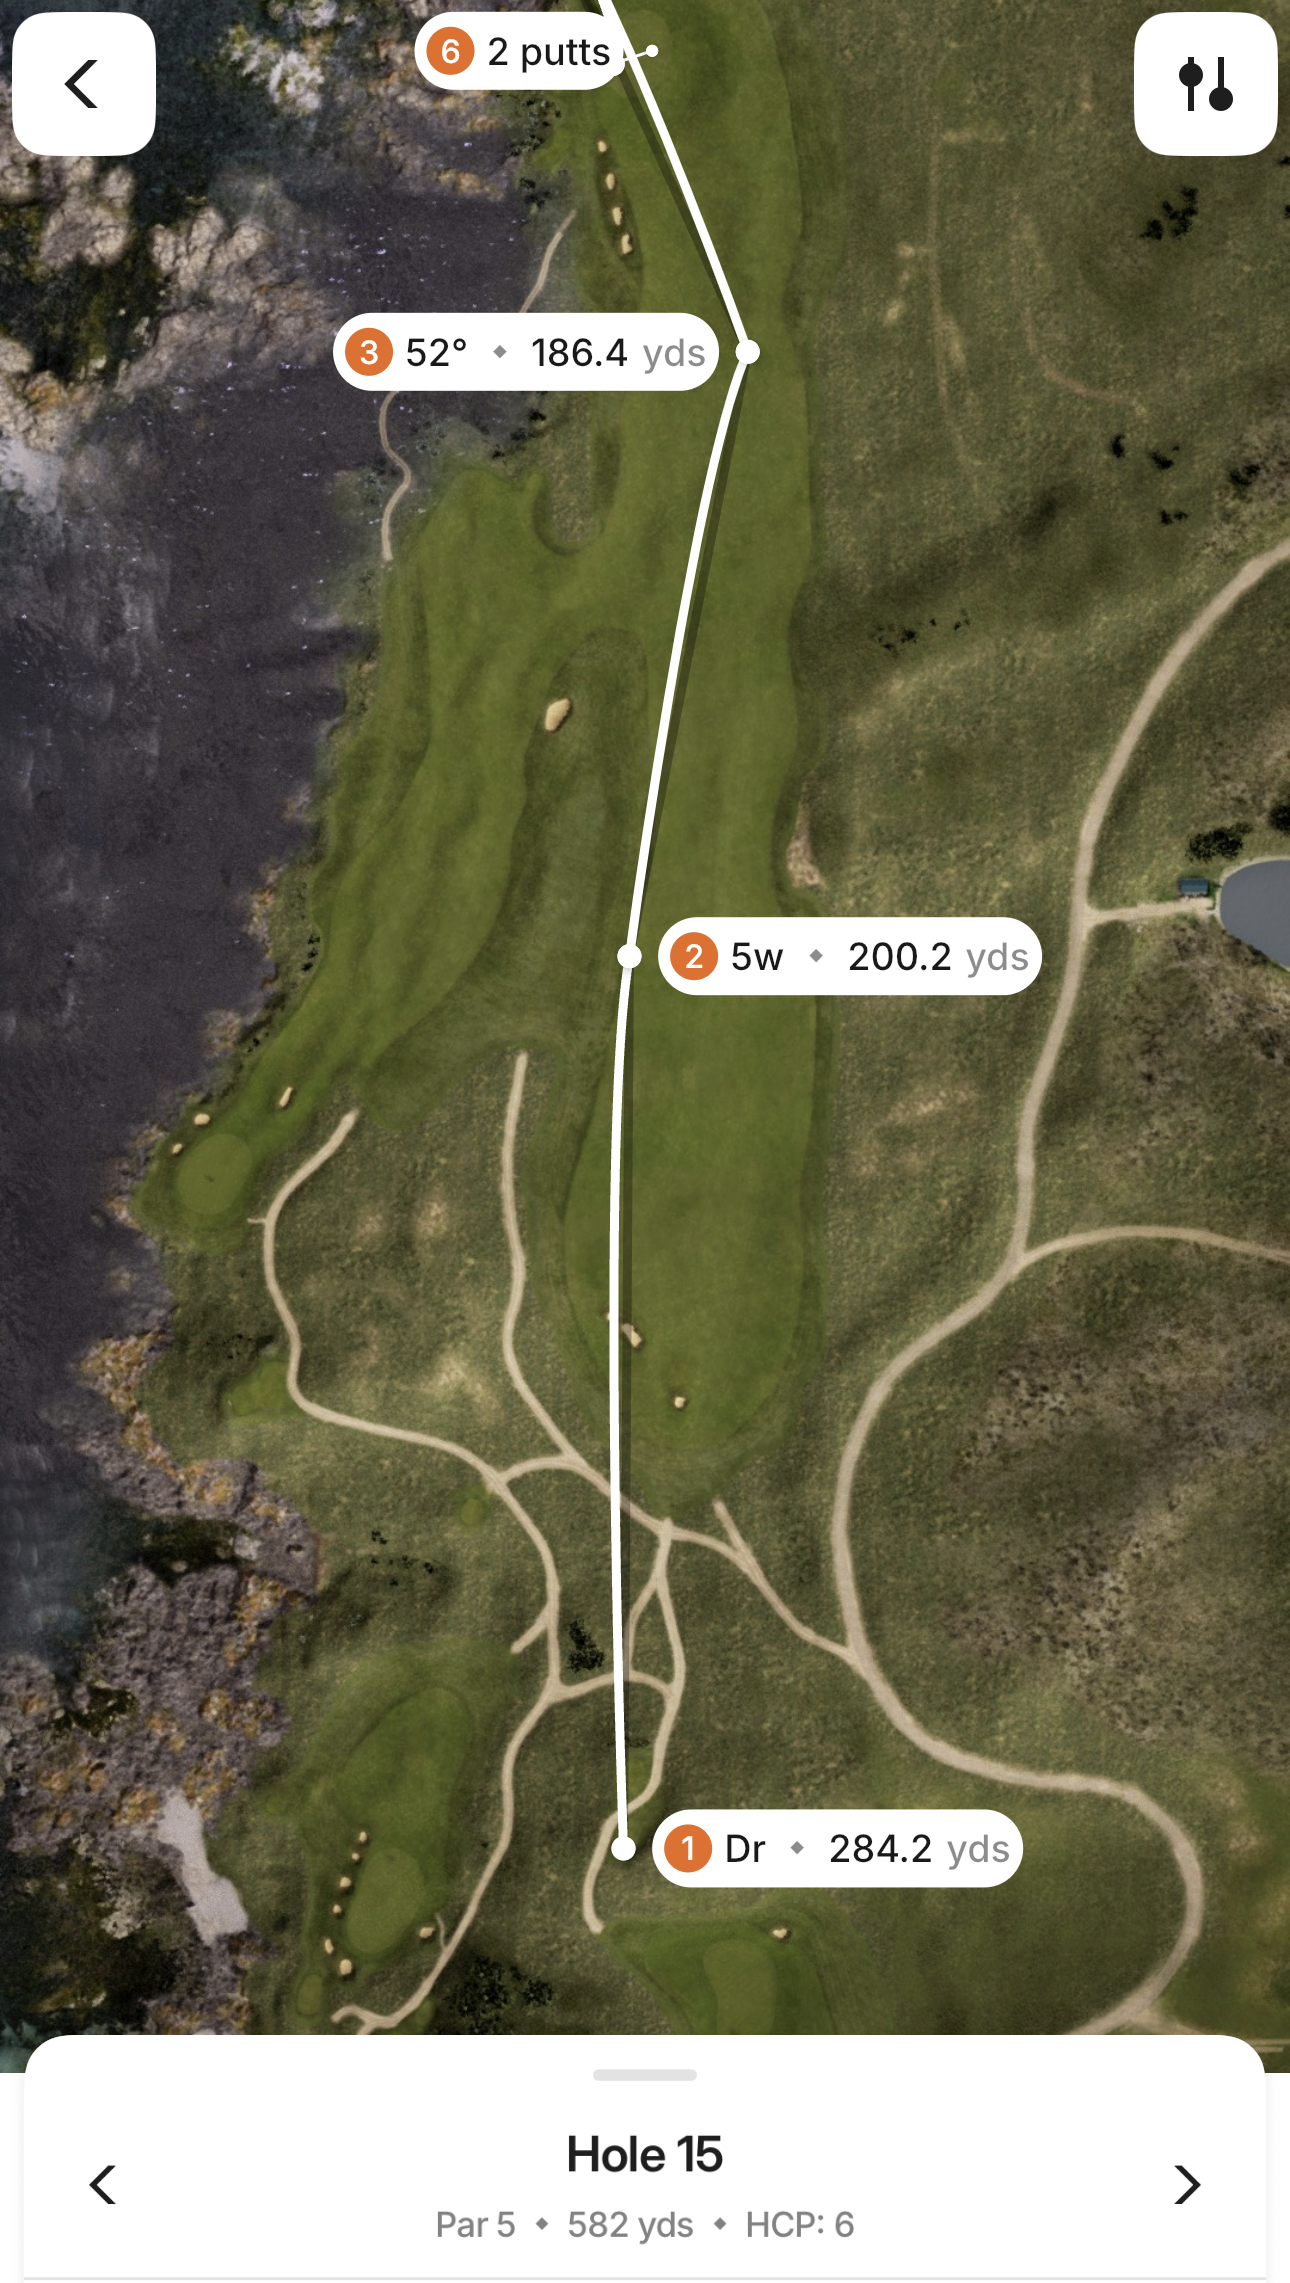
Hole 15
Drive through the gap between the bunkers, then account for the strong right-to-left slope near the green.
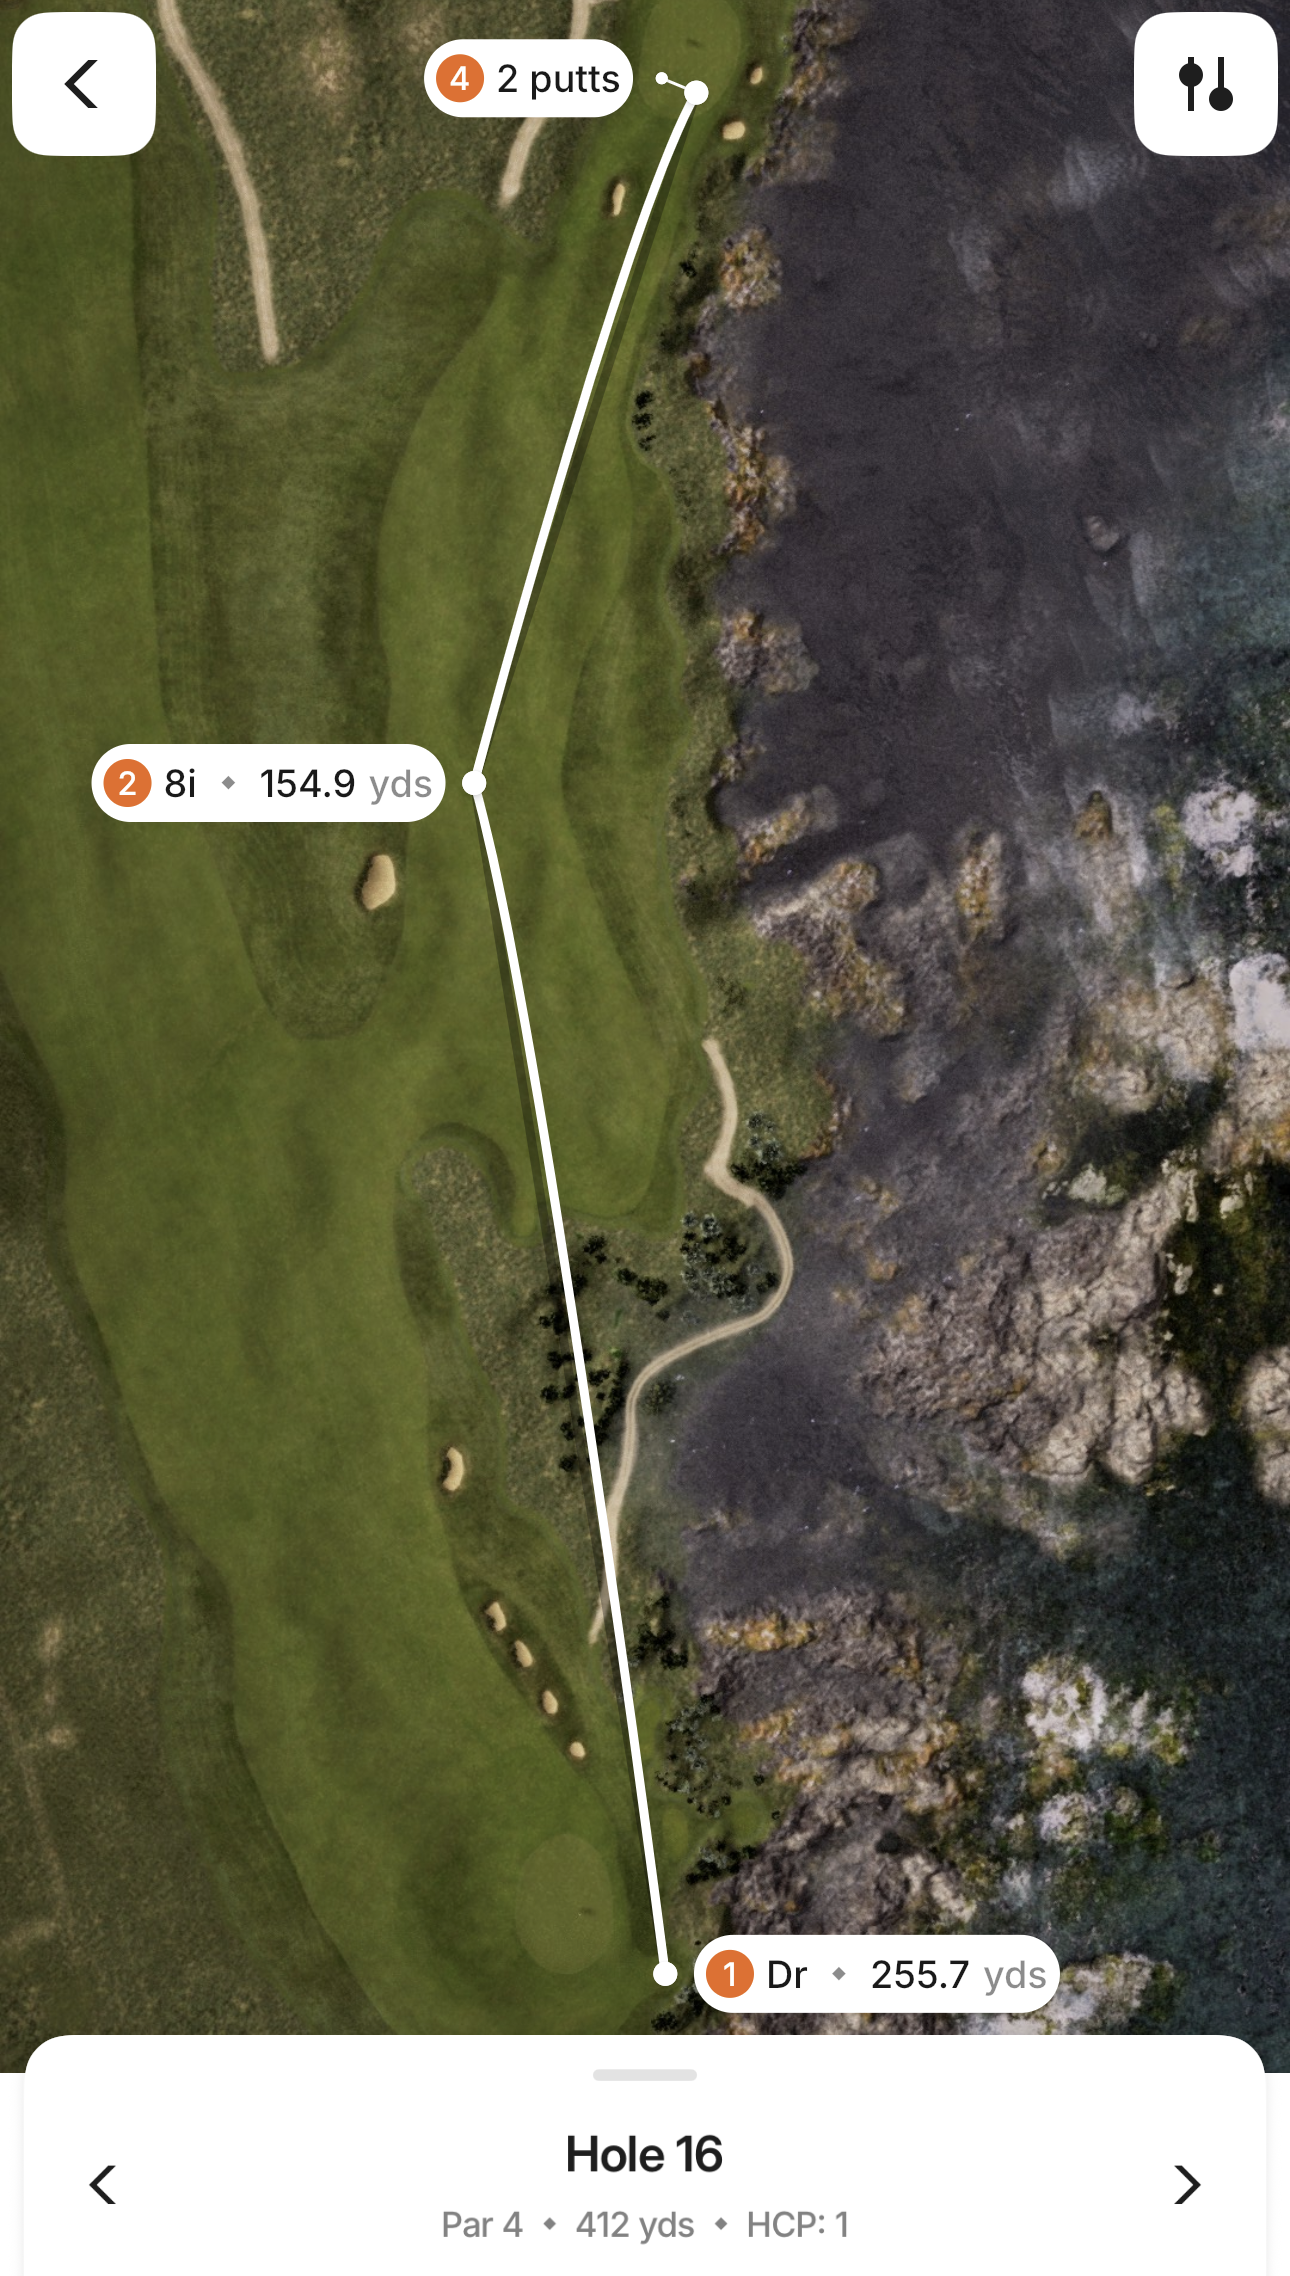
Hole 16
Favor the upper left fairway tier, then keep your approach clear of the central pot bunker.
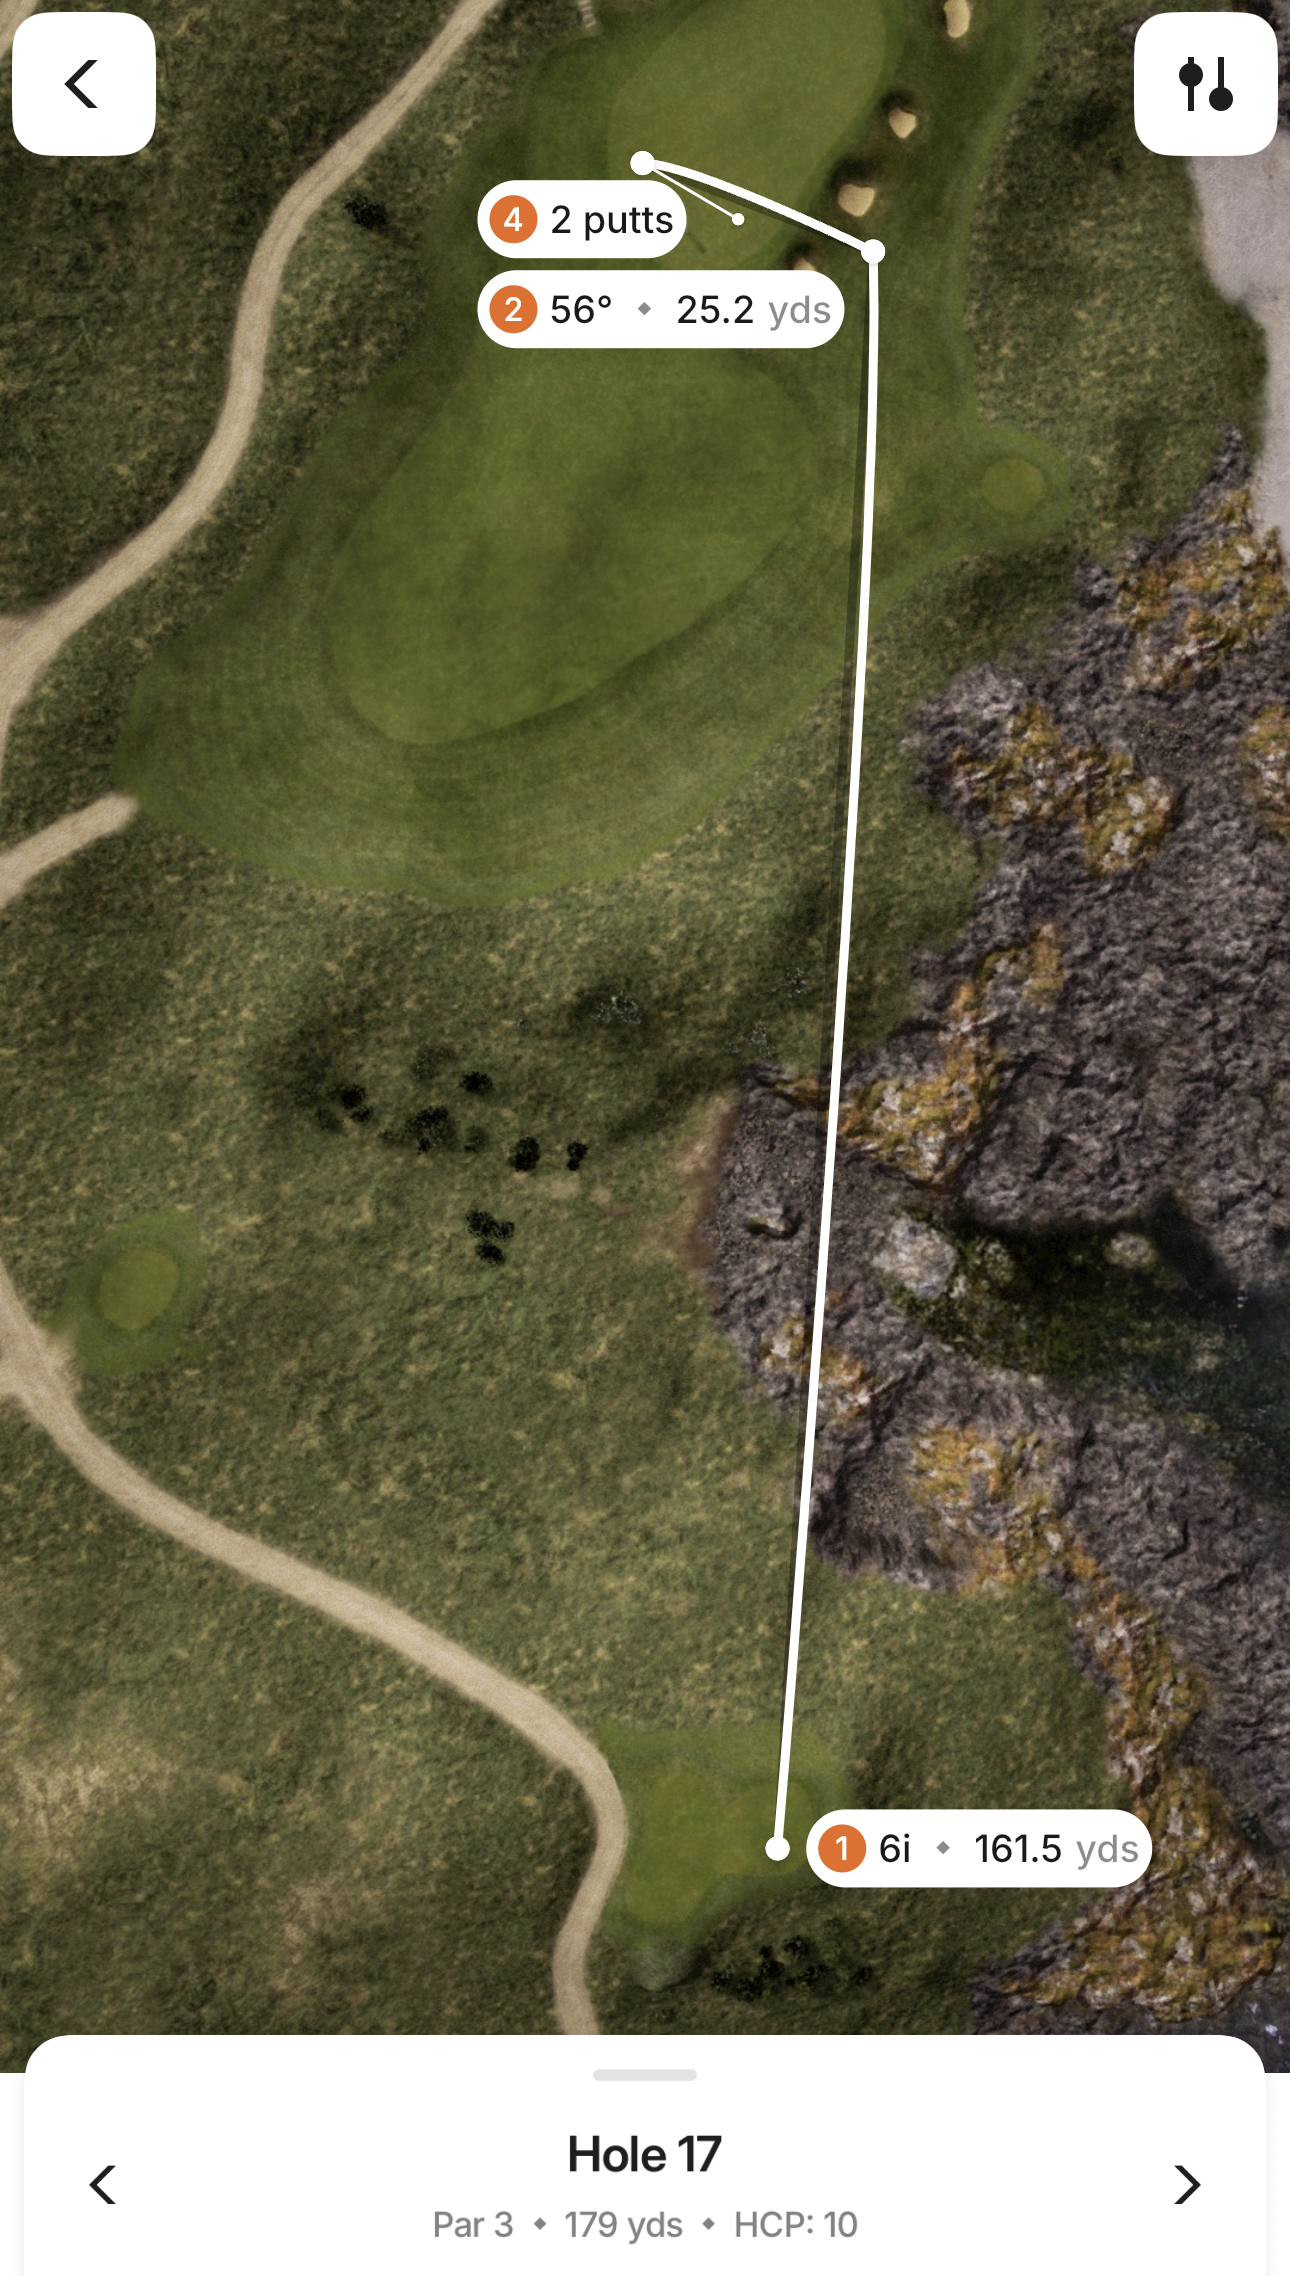
Hole 17
Check the wind from the elevated tee and use the left slope to feed your ball onto the green.
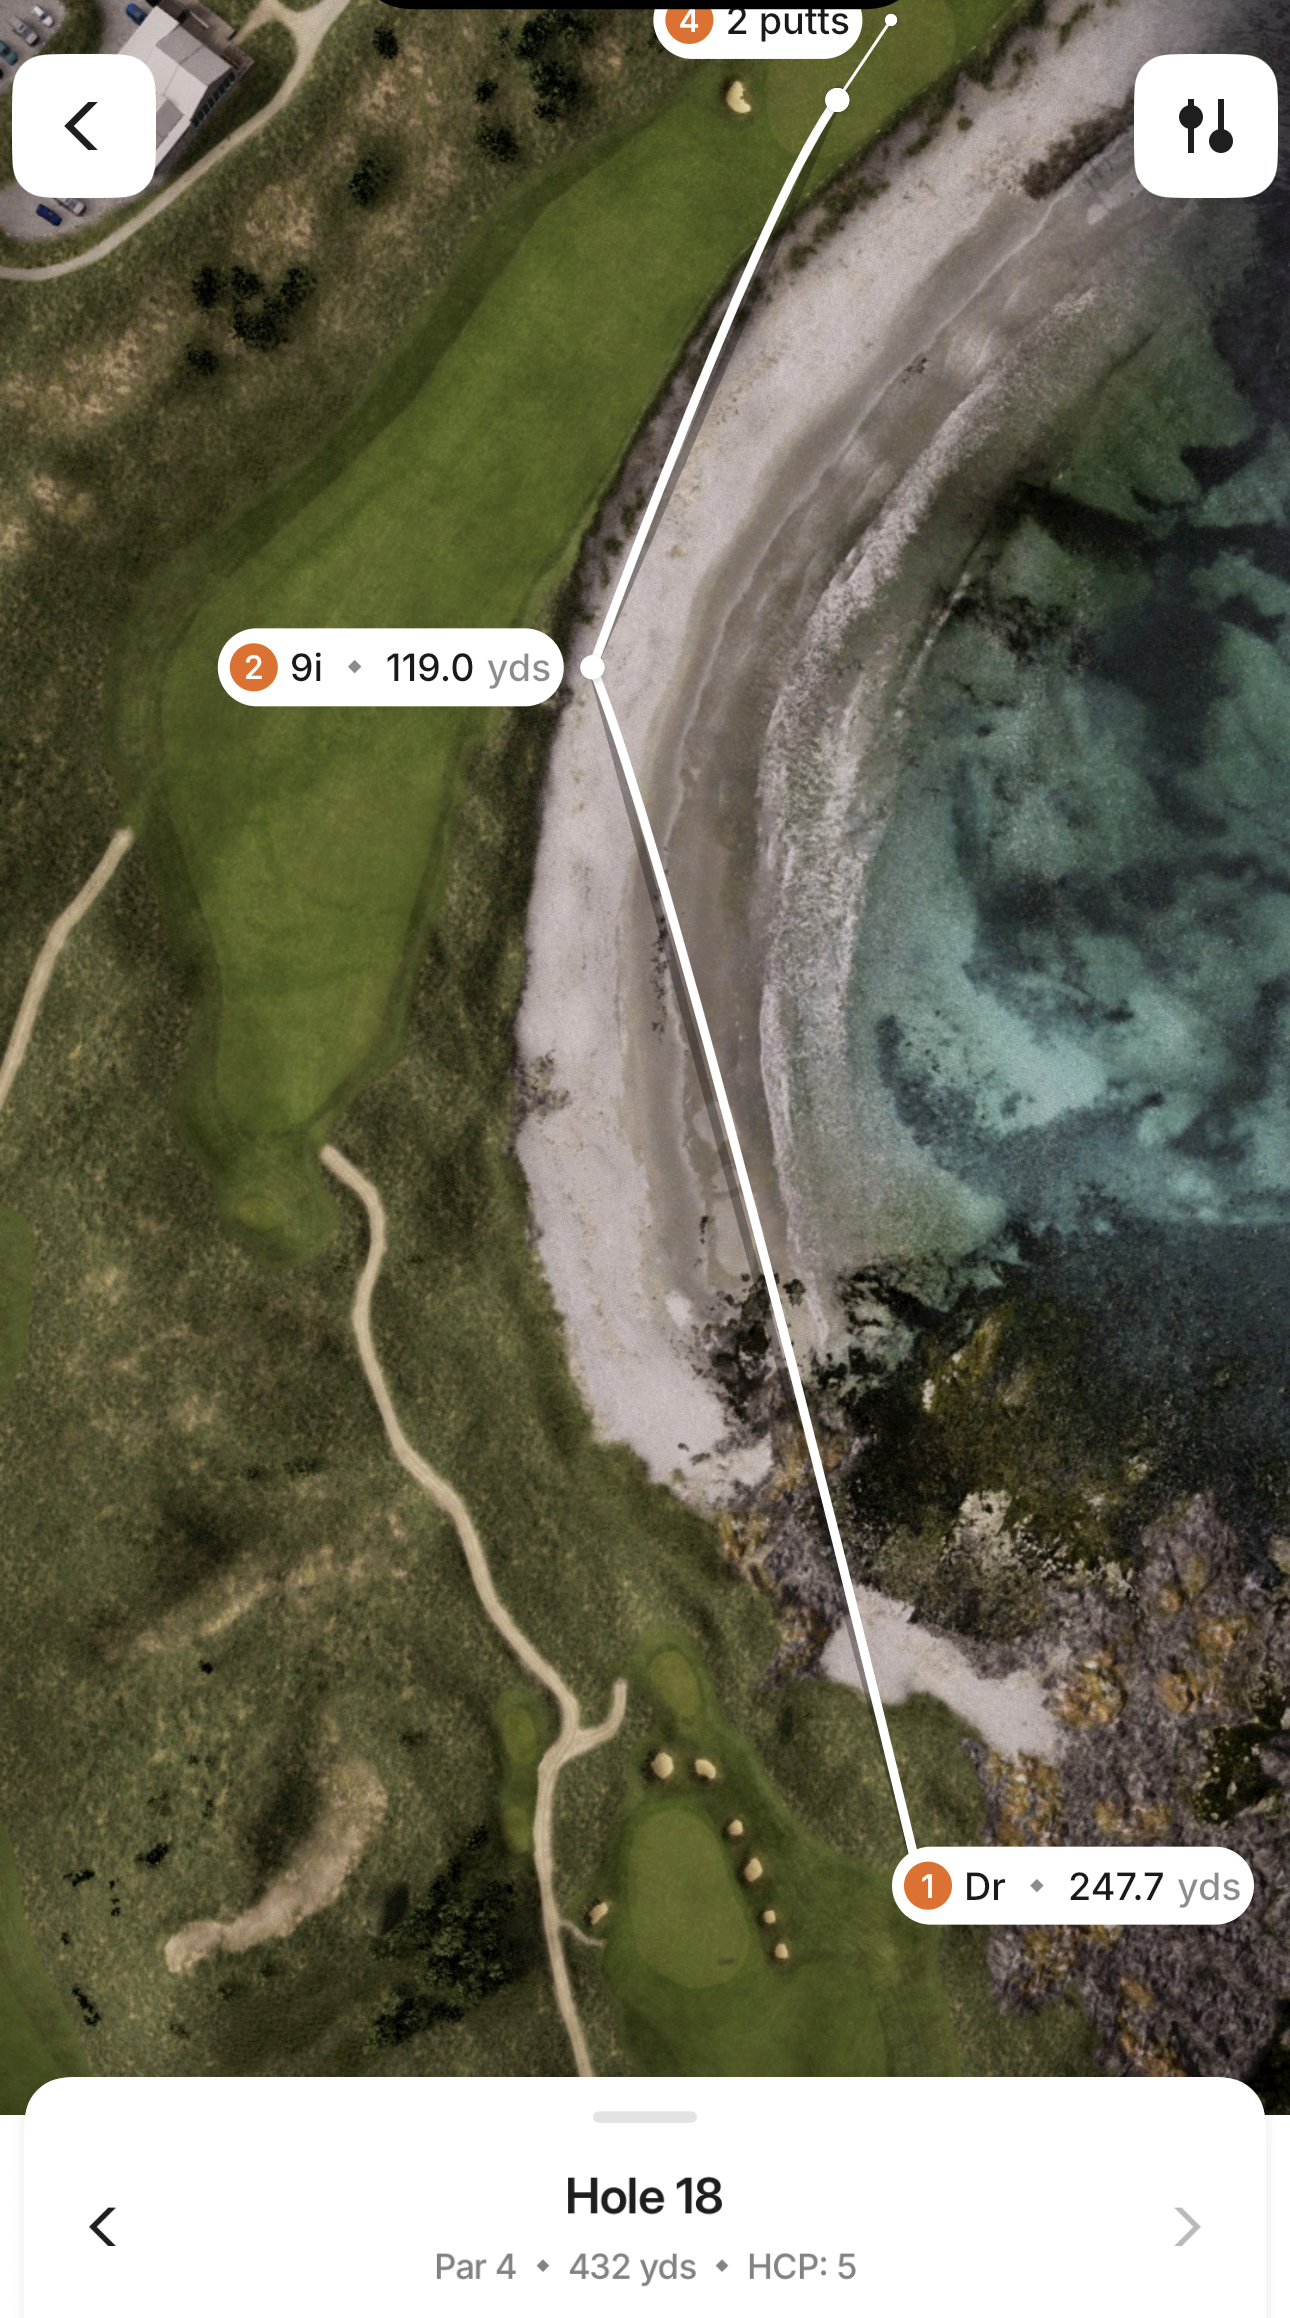
Hole 18
Aim toward the clubhouse for the safer drive, then commit to an approach just right of the front-left bunker.